Customize the layout of your NFT marketplace
A key advantage in using FeverTokens' no-code framework to deploy your own NFT marketplace is that our solution is no-code end-to-end. That is, you can not only configure the Web3 / smart contract aspects of your NFT marketplace but also design the UI all in a web browser. The experience is like making a website using WordPress.
In this guide, we go over the basic design features for the overall layout of your custom NFT marketplace. In following guides under Customize NFT Marketplace, we will delve into each sections in detail.
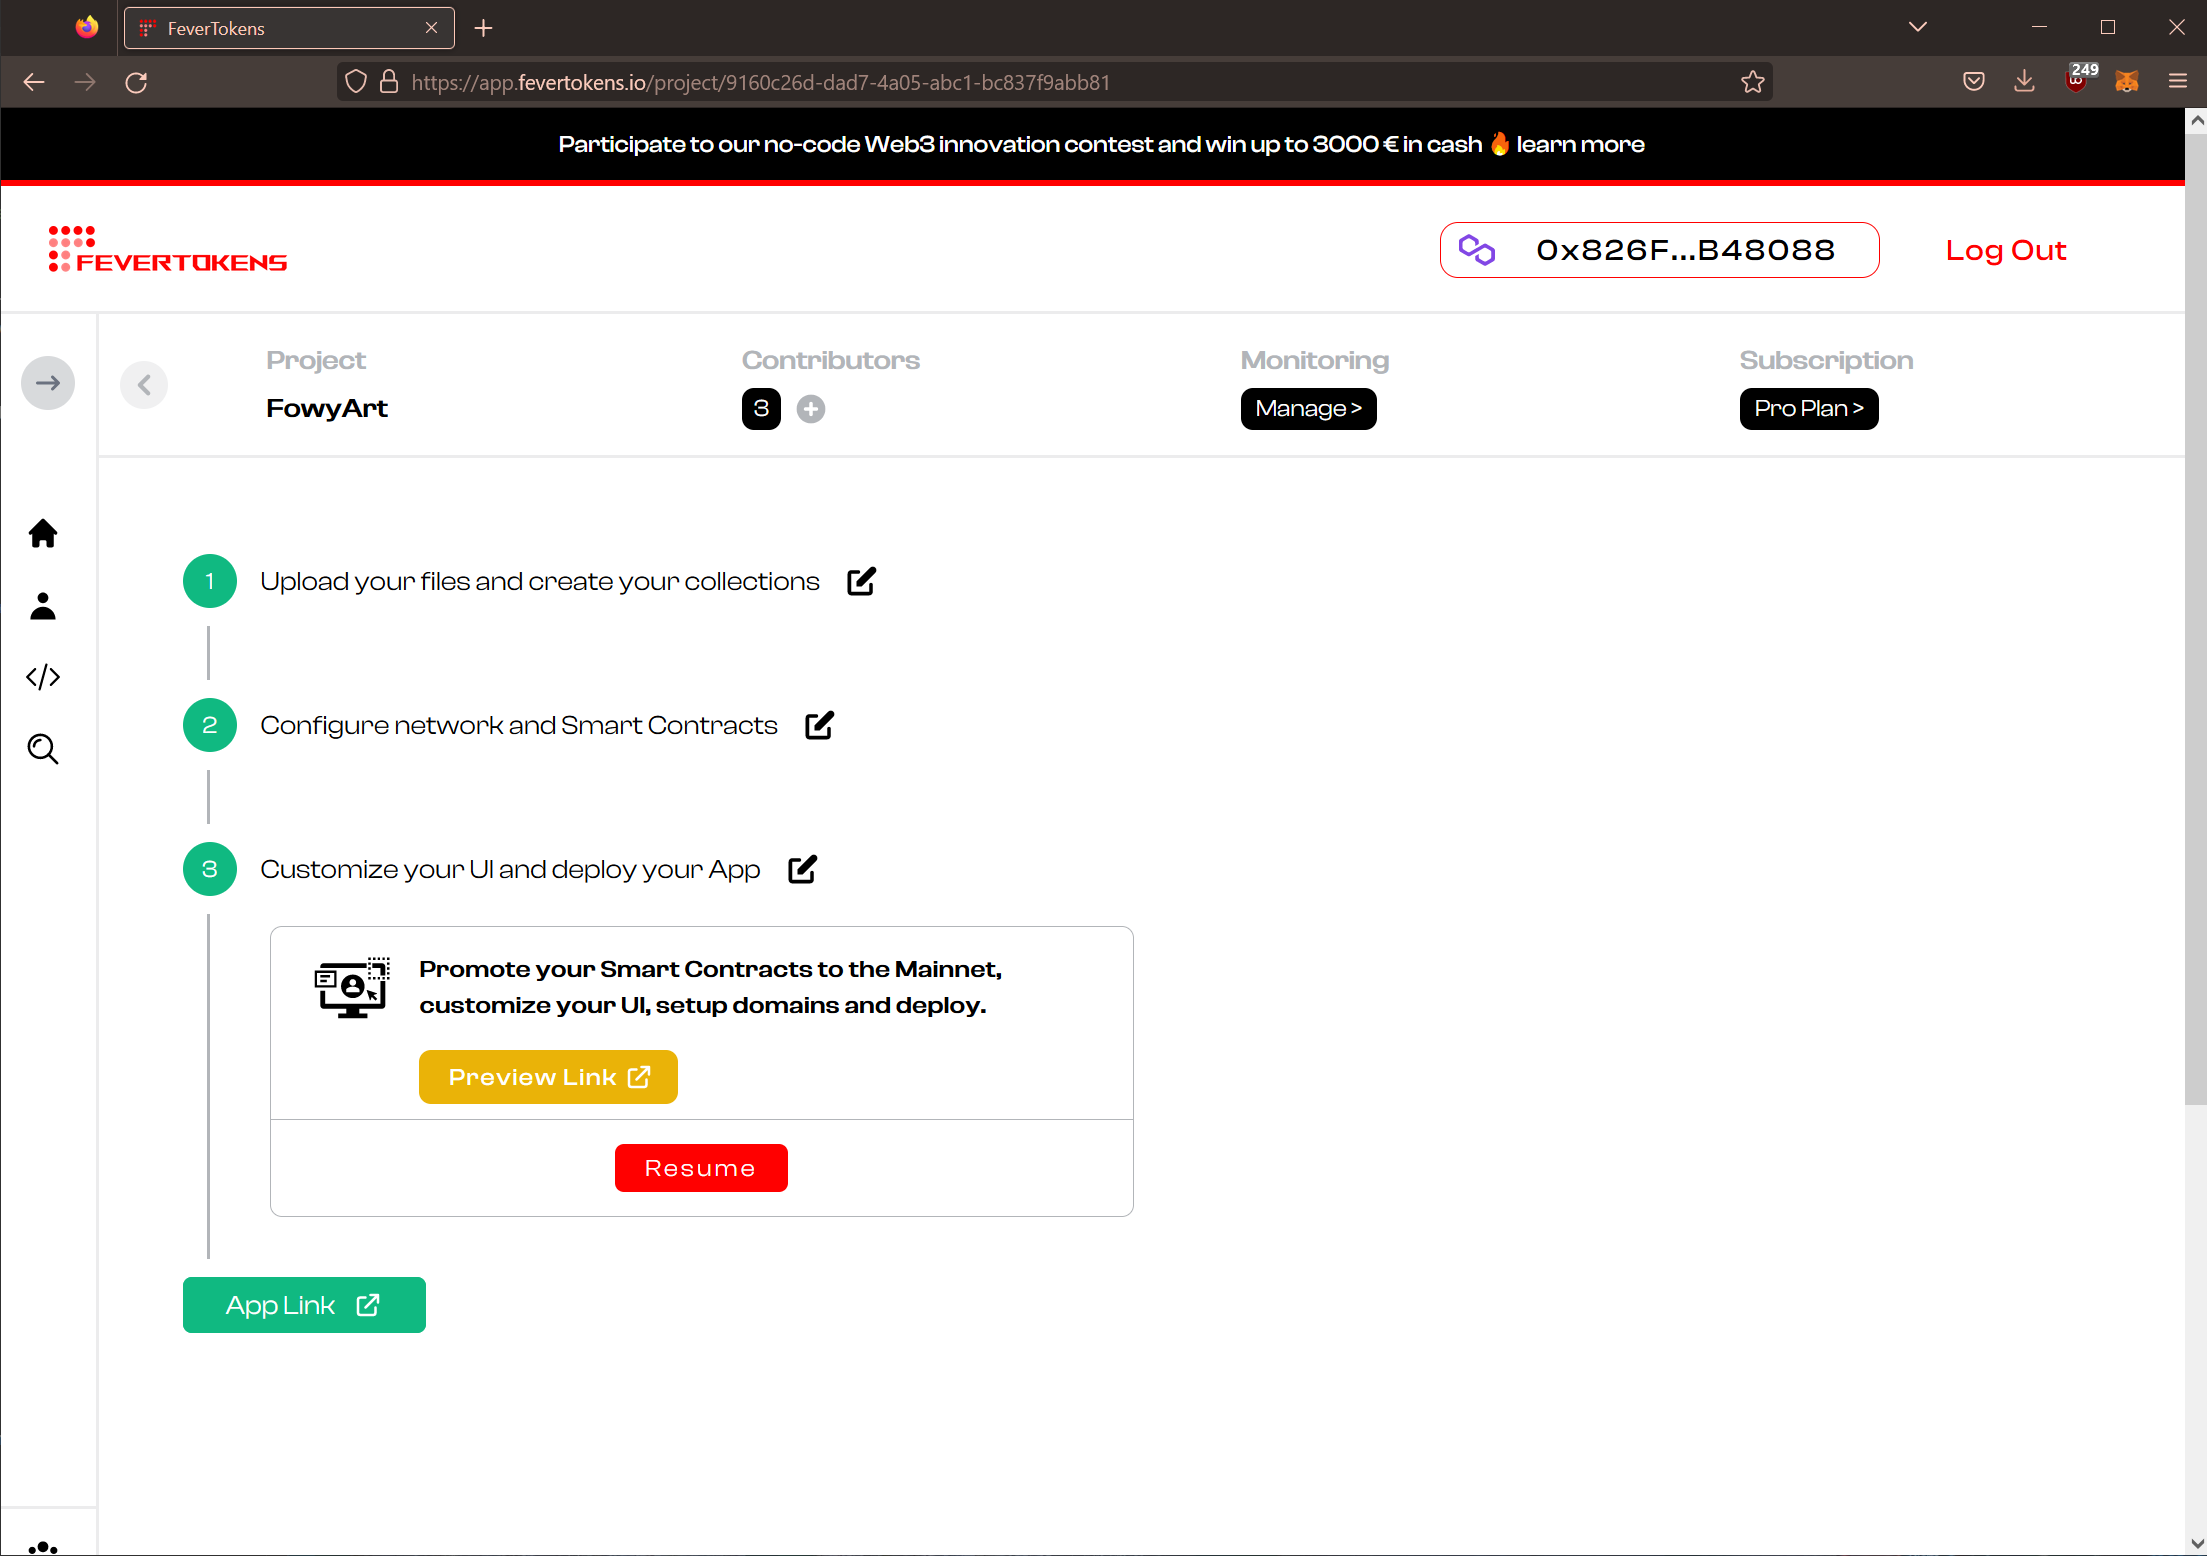
STEP 1. Go to the UI customization panel
- After signing in (see this guide), go to the project dashboard of your deployed project.
- Under Step 3, click Resume to reach the Customize your UI and deploy your App page.
- Click Customize UI to start / resume your UI configurations.
STEP 2. Choose app colors
In the default theme, you can define three colors: Primary, Secondary, and Tertiary.
- Primary color is used on the page background and highlighted texts.
- Secondary color is used on buttons.
- Tertiary color is used on section backgrounds.
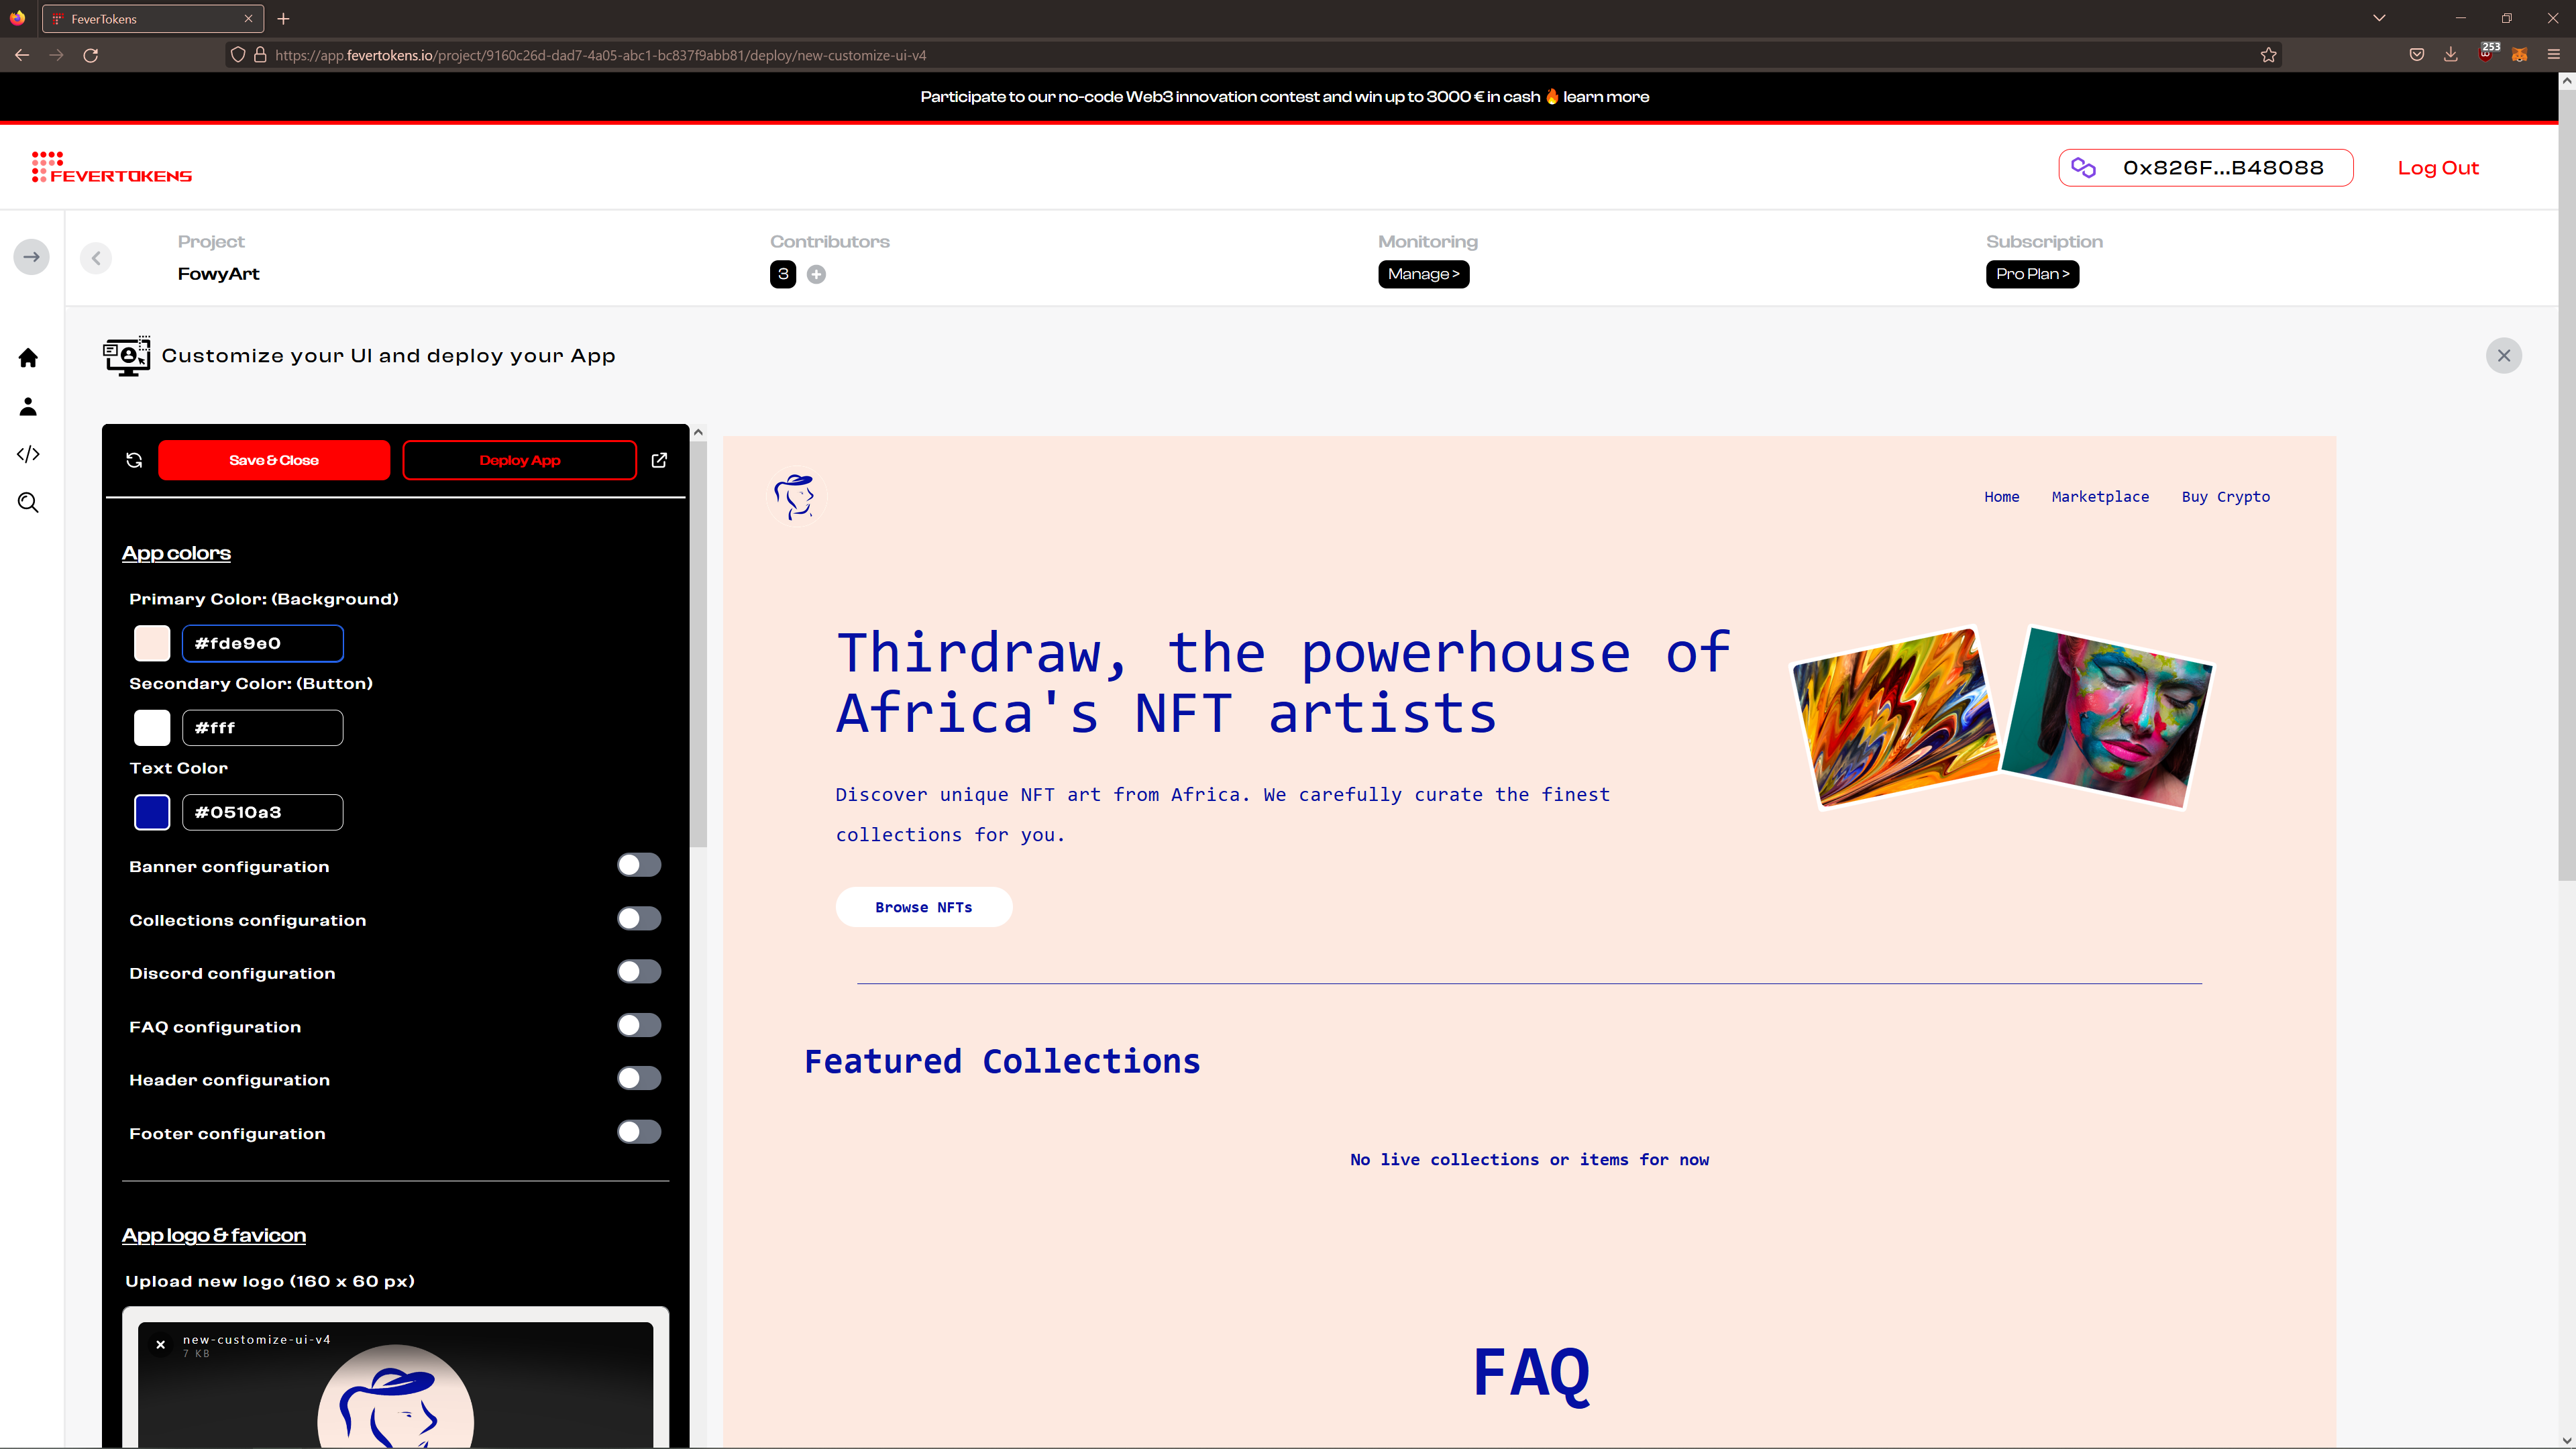
Additionally, you can change the color for each section independently using the toggles below the main colors.
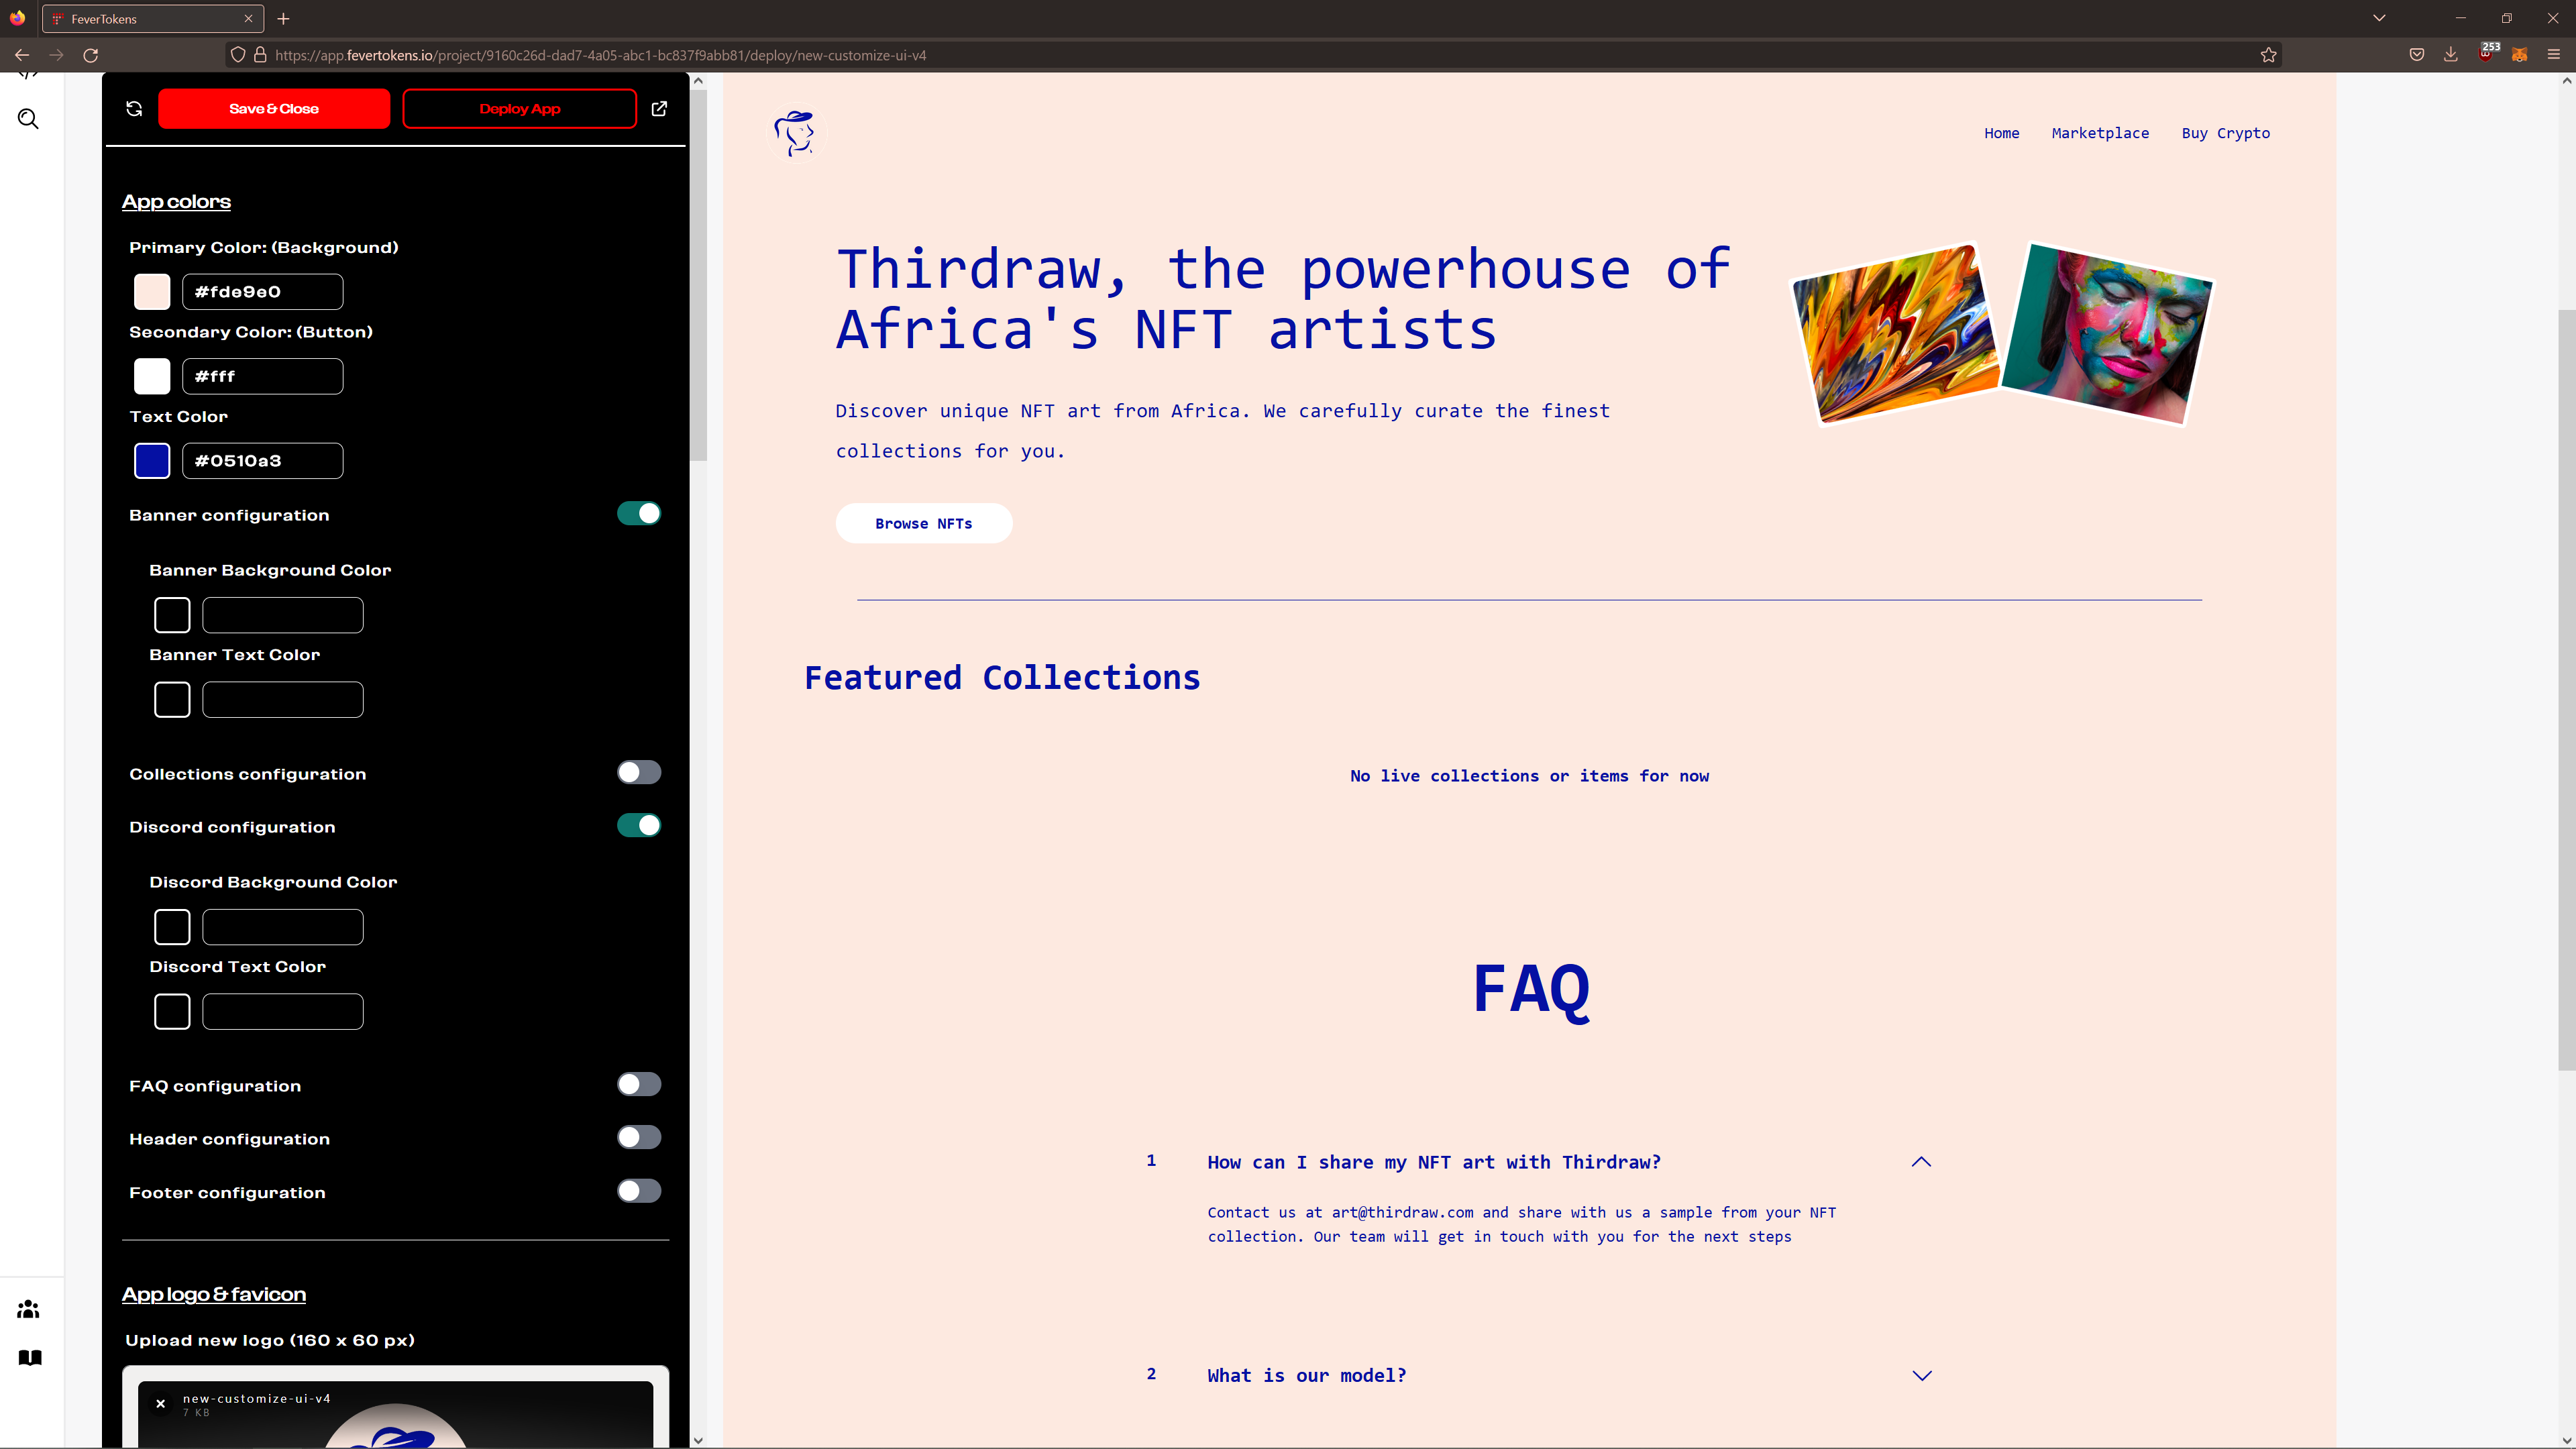
You can choose these colors and enter their HEX values into the left panel.
Note: Changes updated immediately in the preview panel on the right.
STEP 3. Add app logo
Add a new logo for your NFT marketplace by dragging an image into the drop zone or click on it to select an image from your computer.
The logo is display towards the top left of each page and is used as the favicon for your application.
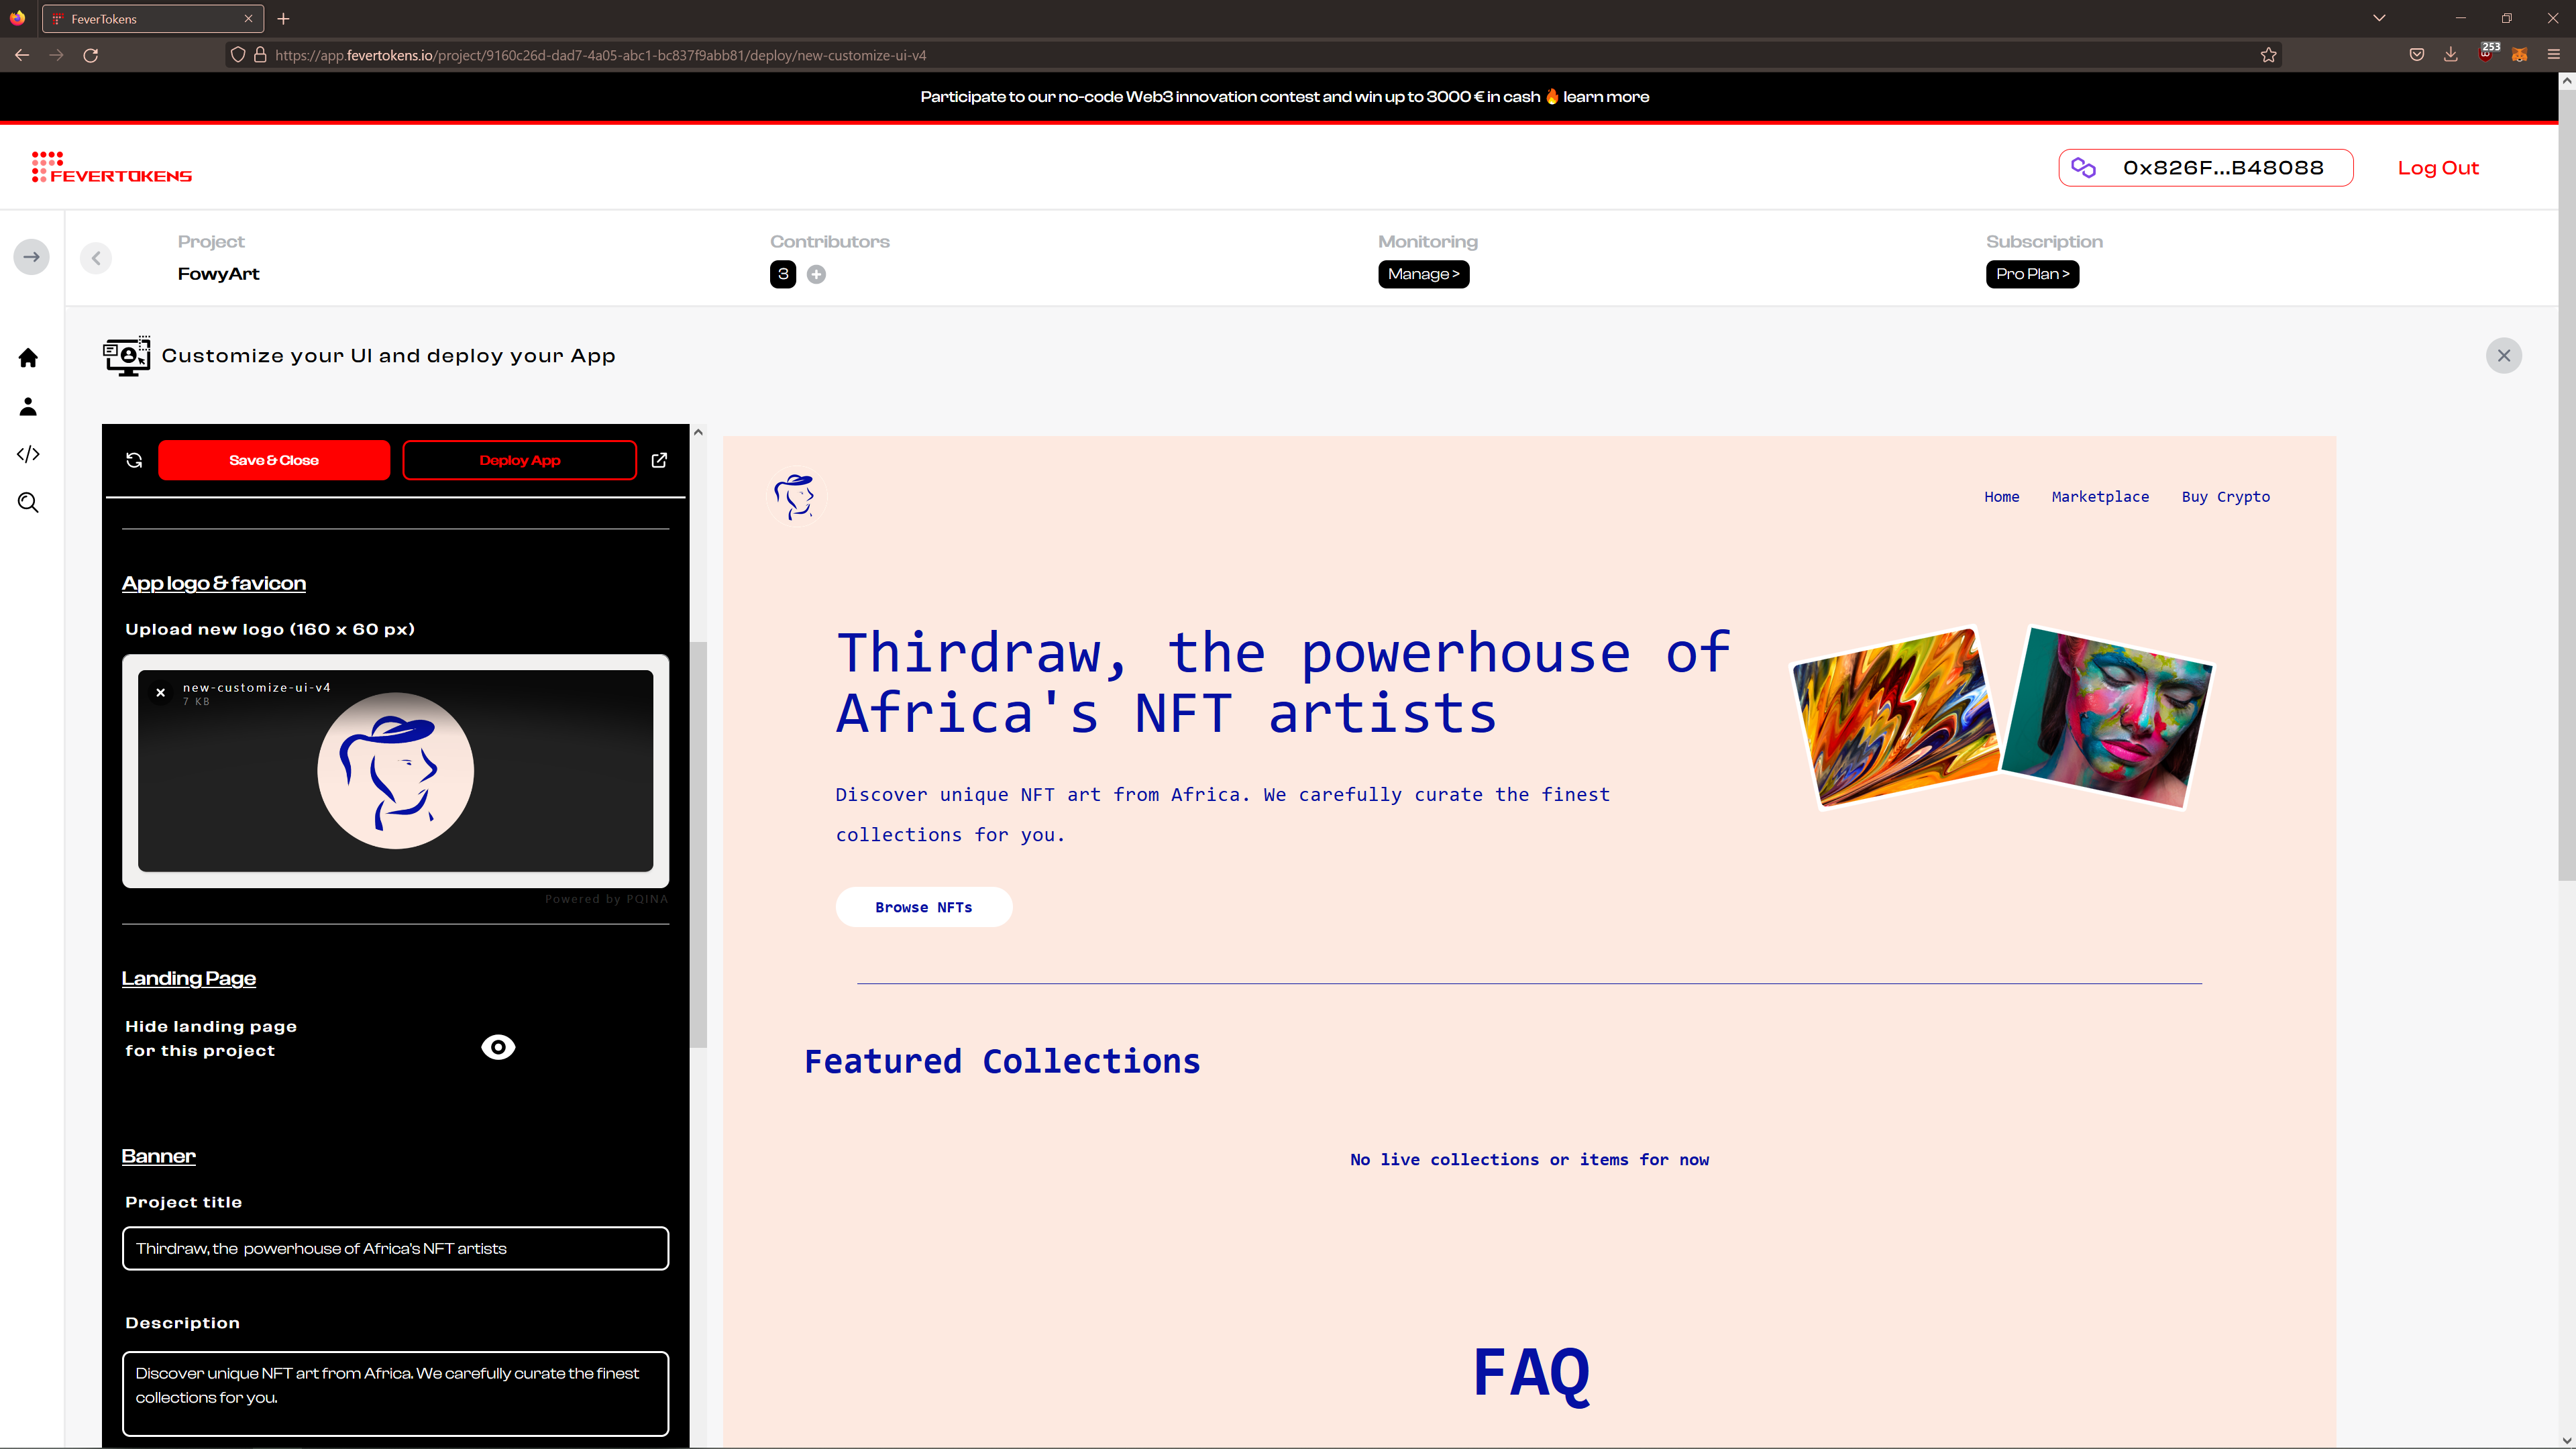
STEP 4. Toggle page visibility
Under App logo & favicon, you can choose the hide this landing page. By default, it is made visible.
In the following sections, we go over the main sections and theoptional sections in your custom NFT marketplace.