Customize smart contract for your custom NFT marketplace
In the previous guides, we showed you how to starting your NFT project and upload your collection.
In this guide, we walk you through how you can customize advanced smart contracts using FeverTokens console.
STEP 1. Initiate the step
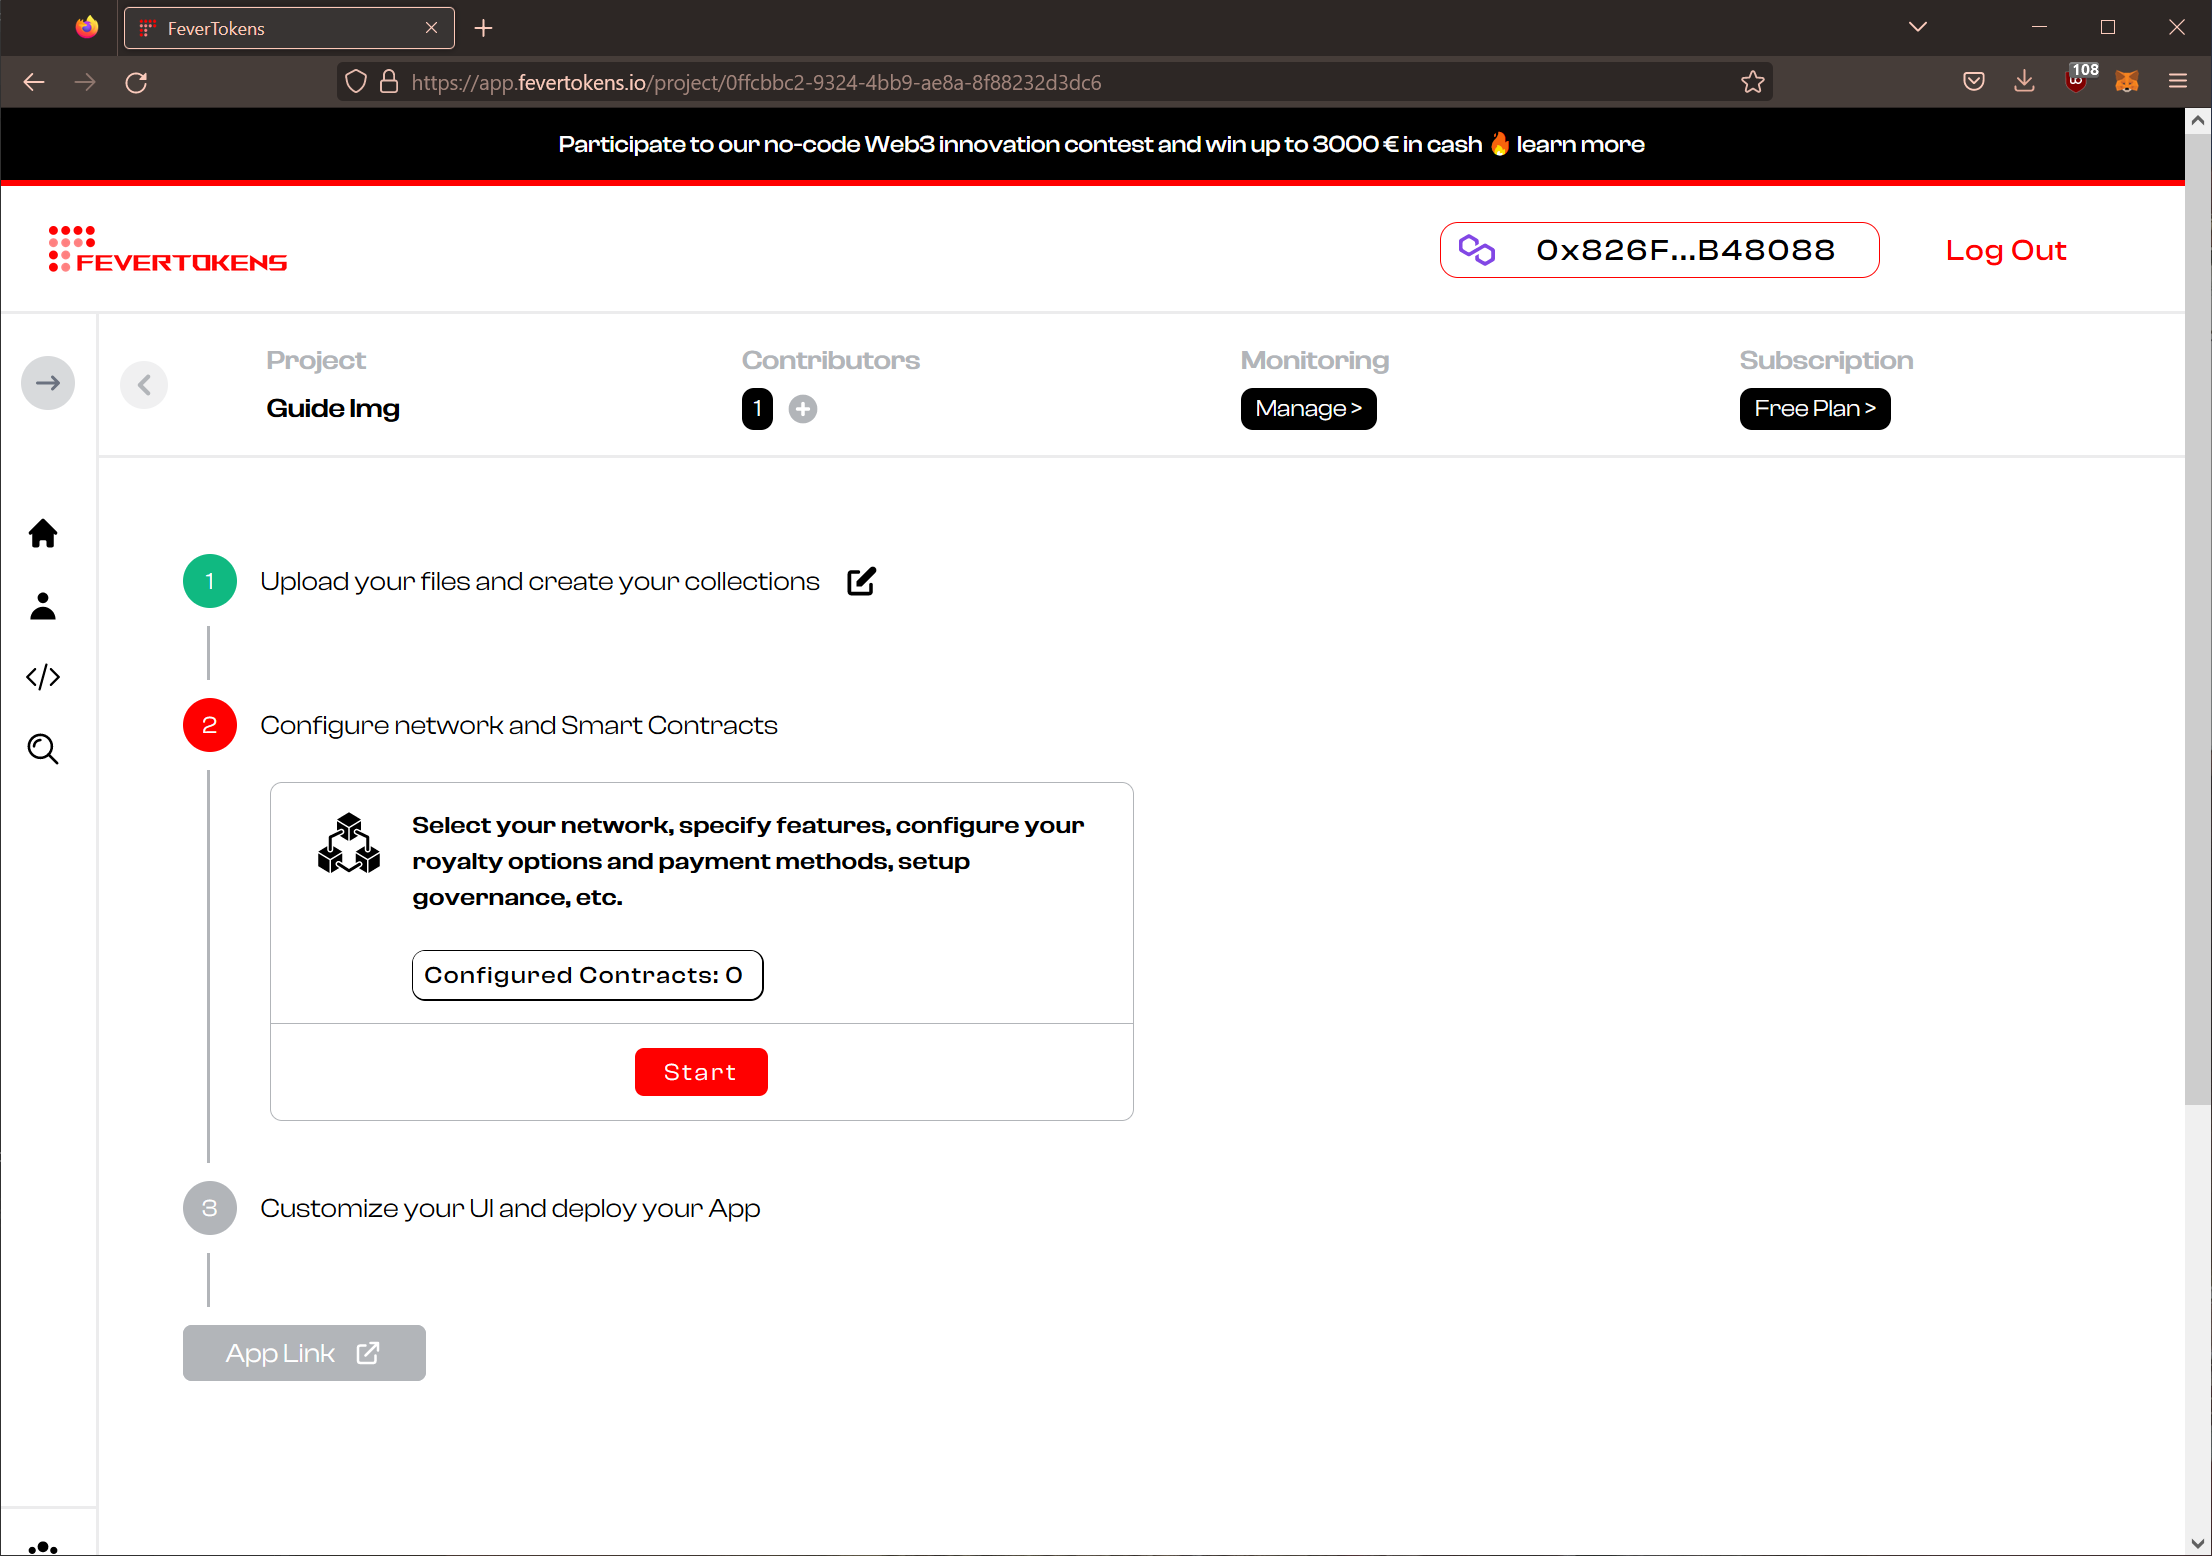
- After you have specified the desired collection(s) and item(s), click on the Dashboard button on the top left to return to the project dashboard.
- Click Start under "2. Configure network and Smart Contracts" to start configuring the collections.
STEP 2. Choose the collection to customize smart contracts for
Choose the collection that you want to configure for and click Configure.
STEP 3. Choose the type of smart contracts to configure
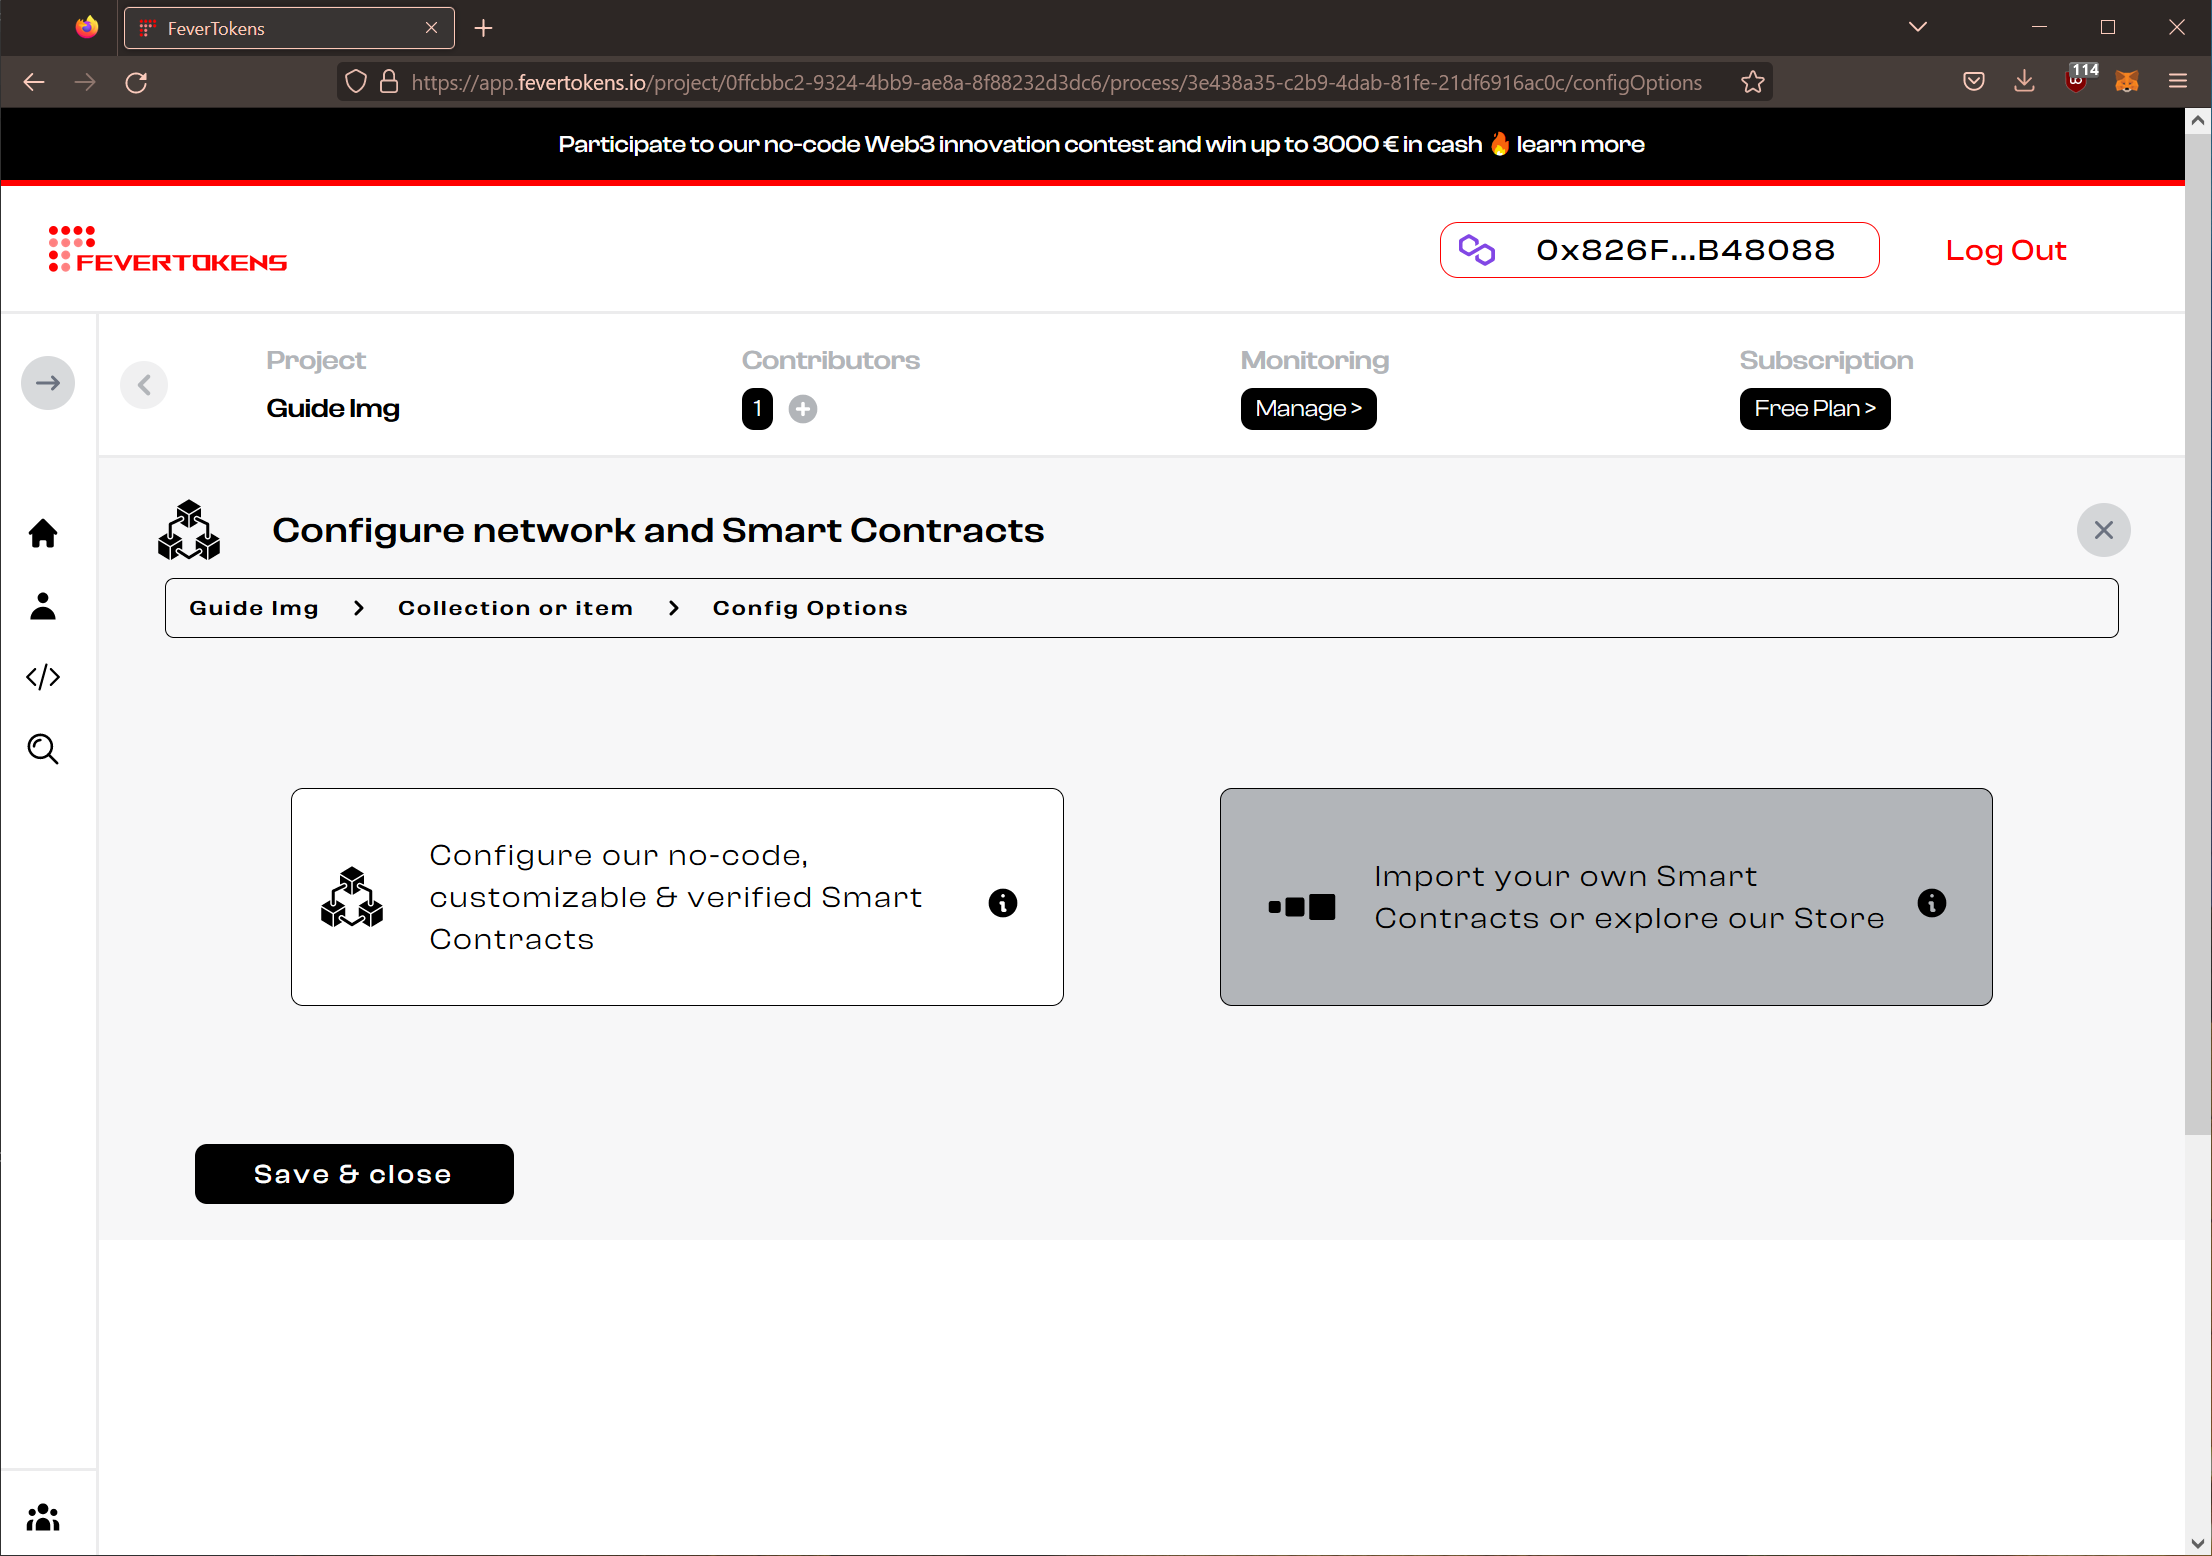
Choose to Configure our no-code, customizable & verified Smart Contracts and click Next.
STEP 4. Configure the network
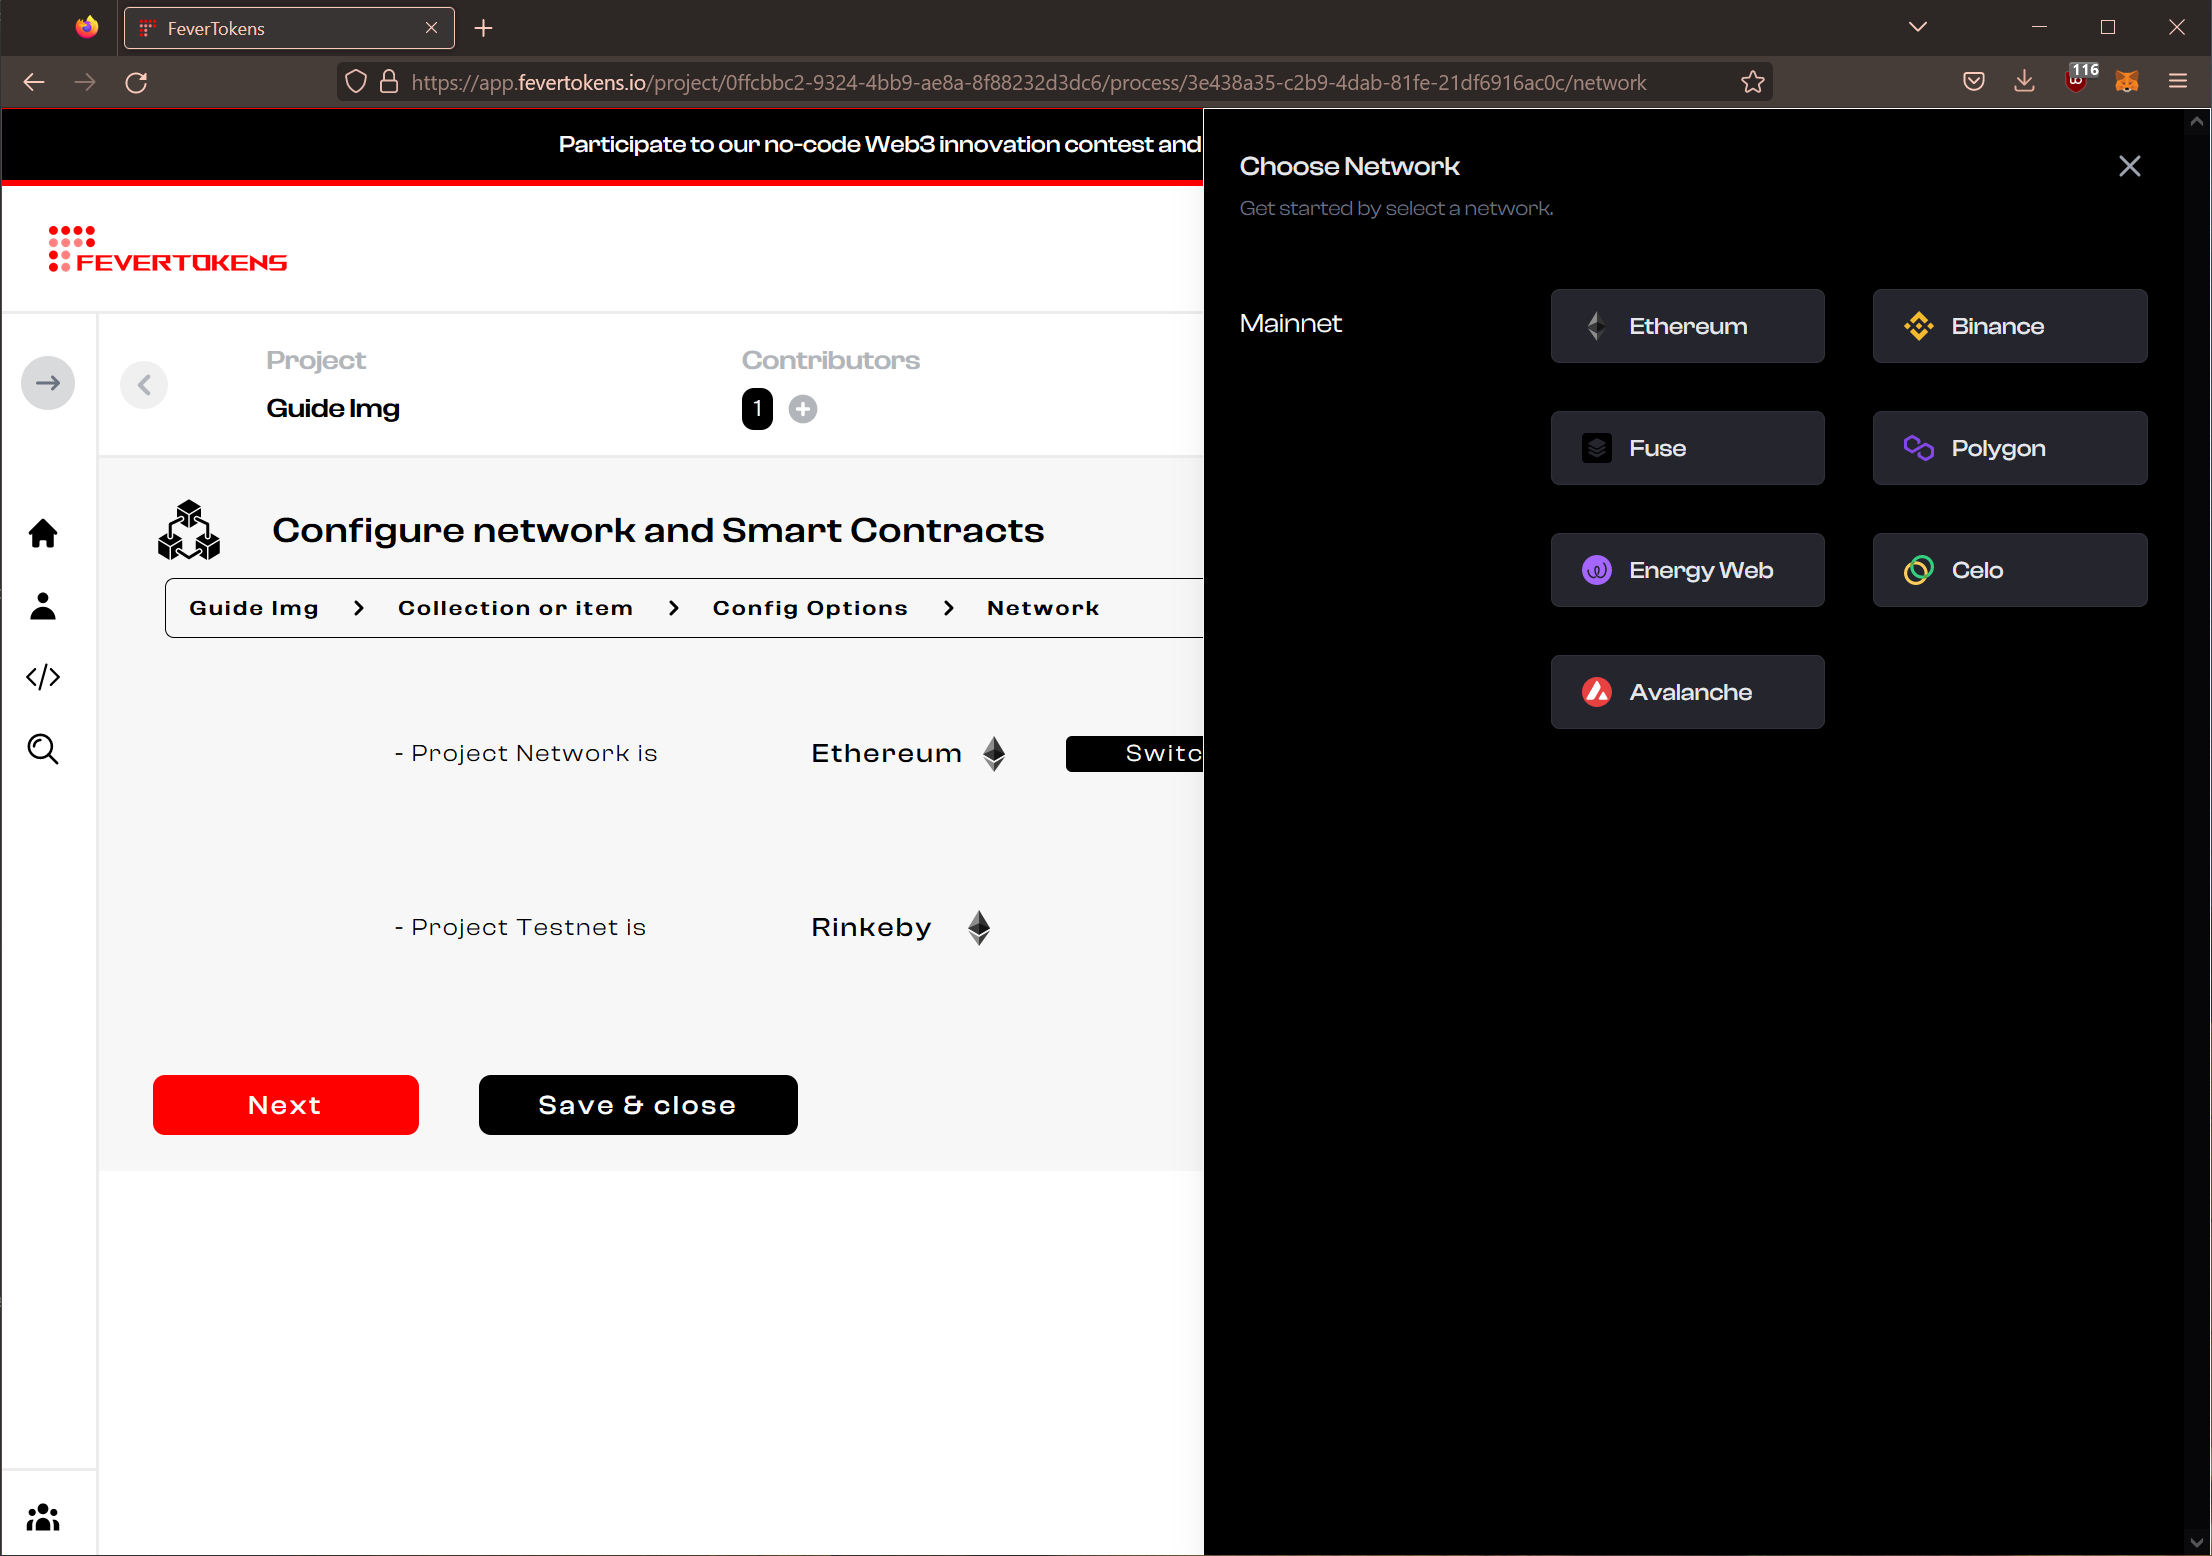
At this step, you can choose the project network and project Testnet.
- Click the Switch Network button in the Project Network row.
- In the slide-in menu, choose among the supported blockchain networks.
- A corresponding Project Testnet is selected automatically.
When you are ready, click Next.
Note: We currently support Ethereum, Binance Smart Chain, Fuse, Polygon, Celo, Avalanche, and EnergyWeb. More EVM-compatible chains will be added soon.
STEP 5. Configure the NFT factory
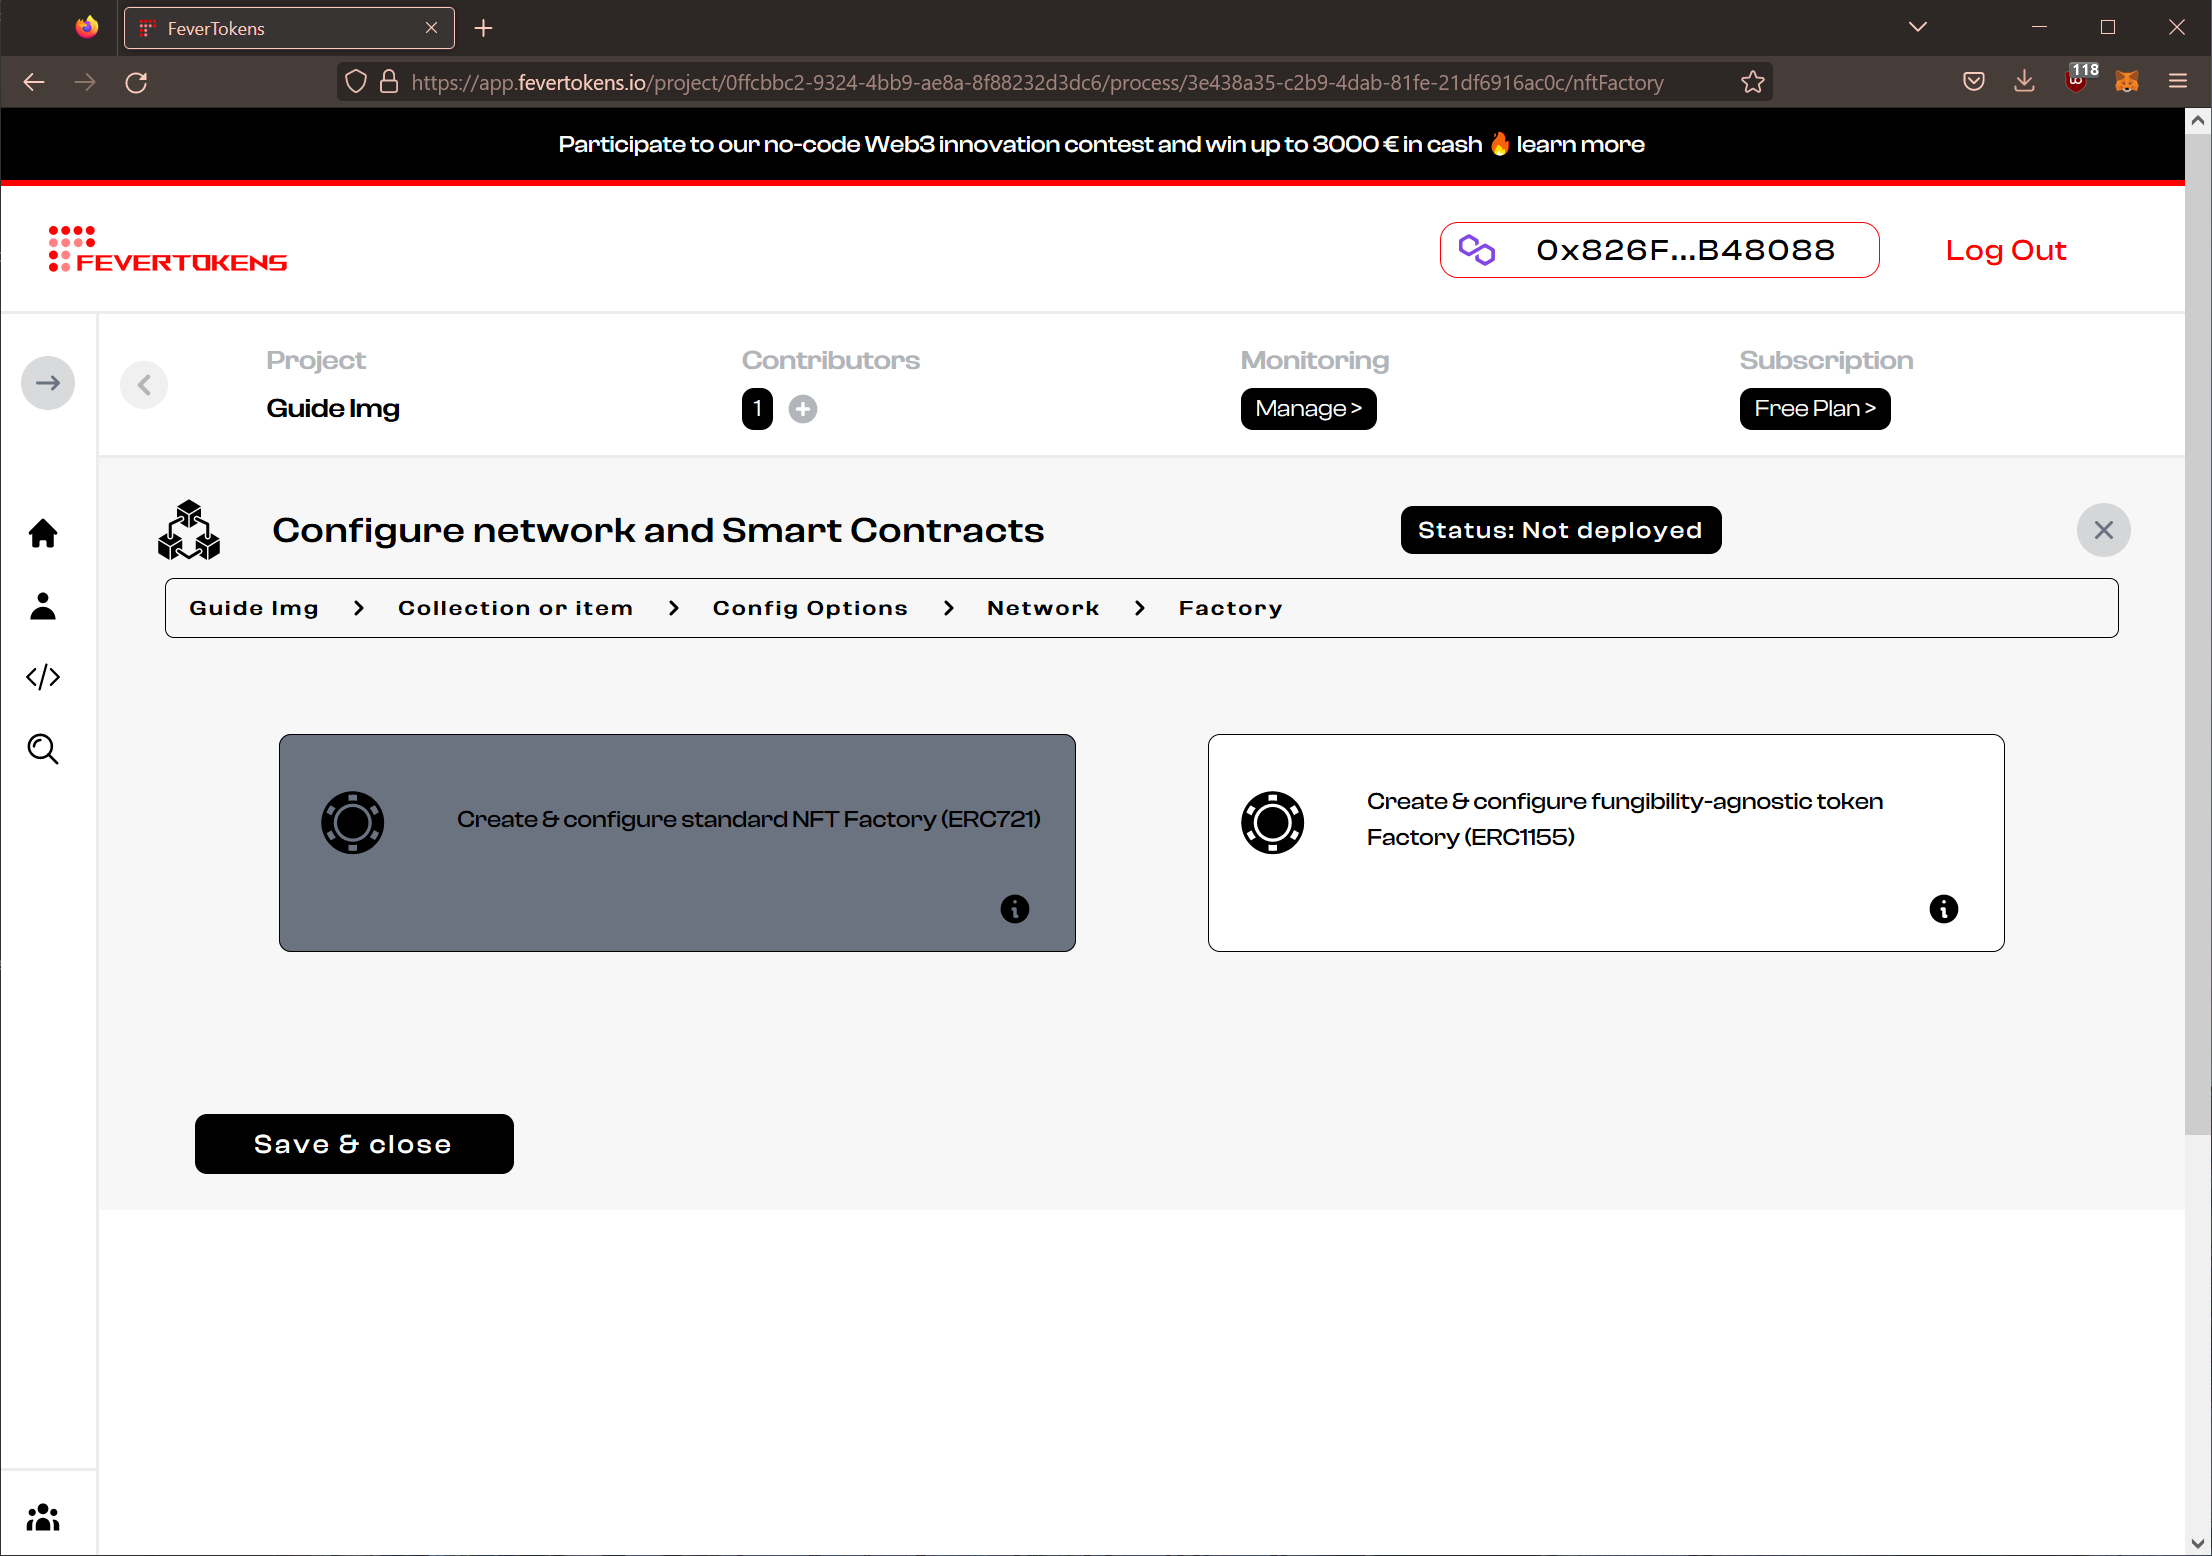
At this step, you can choose between the standard ERC721 NFT factory or the fungibility-agnostic ERC1155 NFT factory.
Note: Depending on the asset type and NFT settings, both options may not be available.
Click Next.
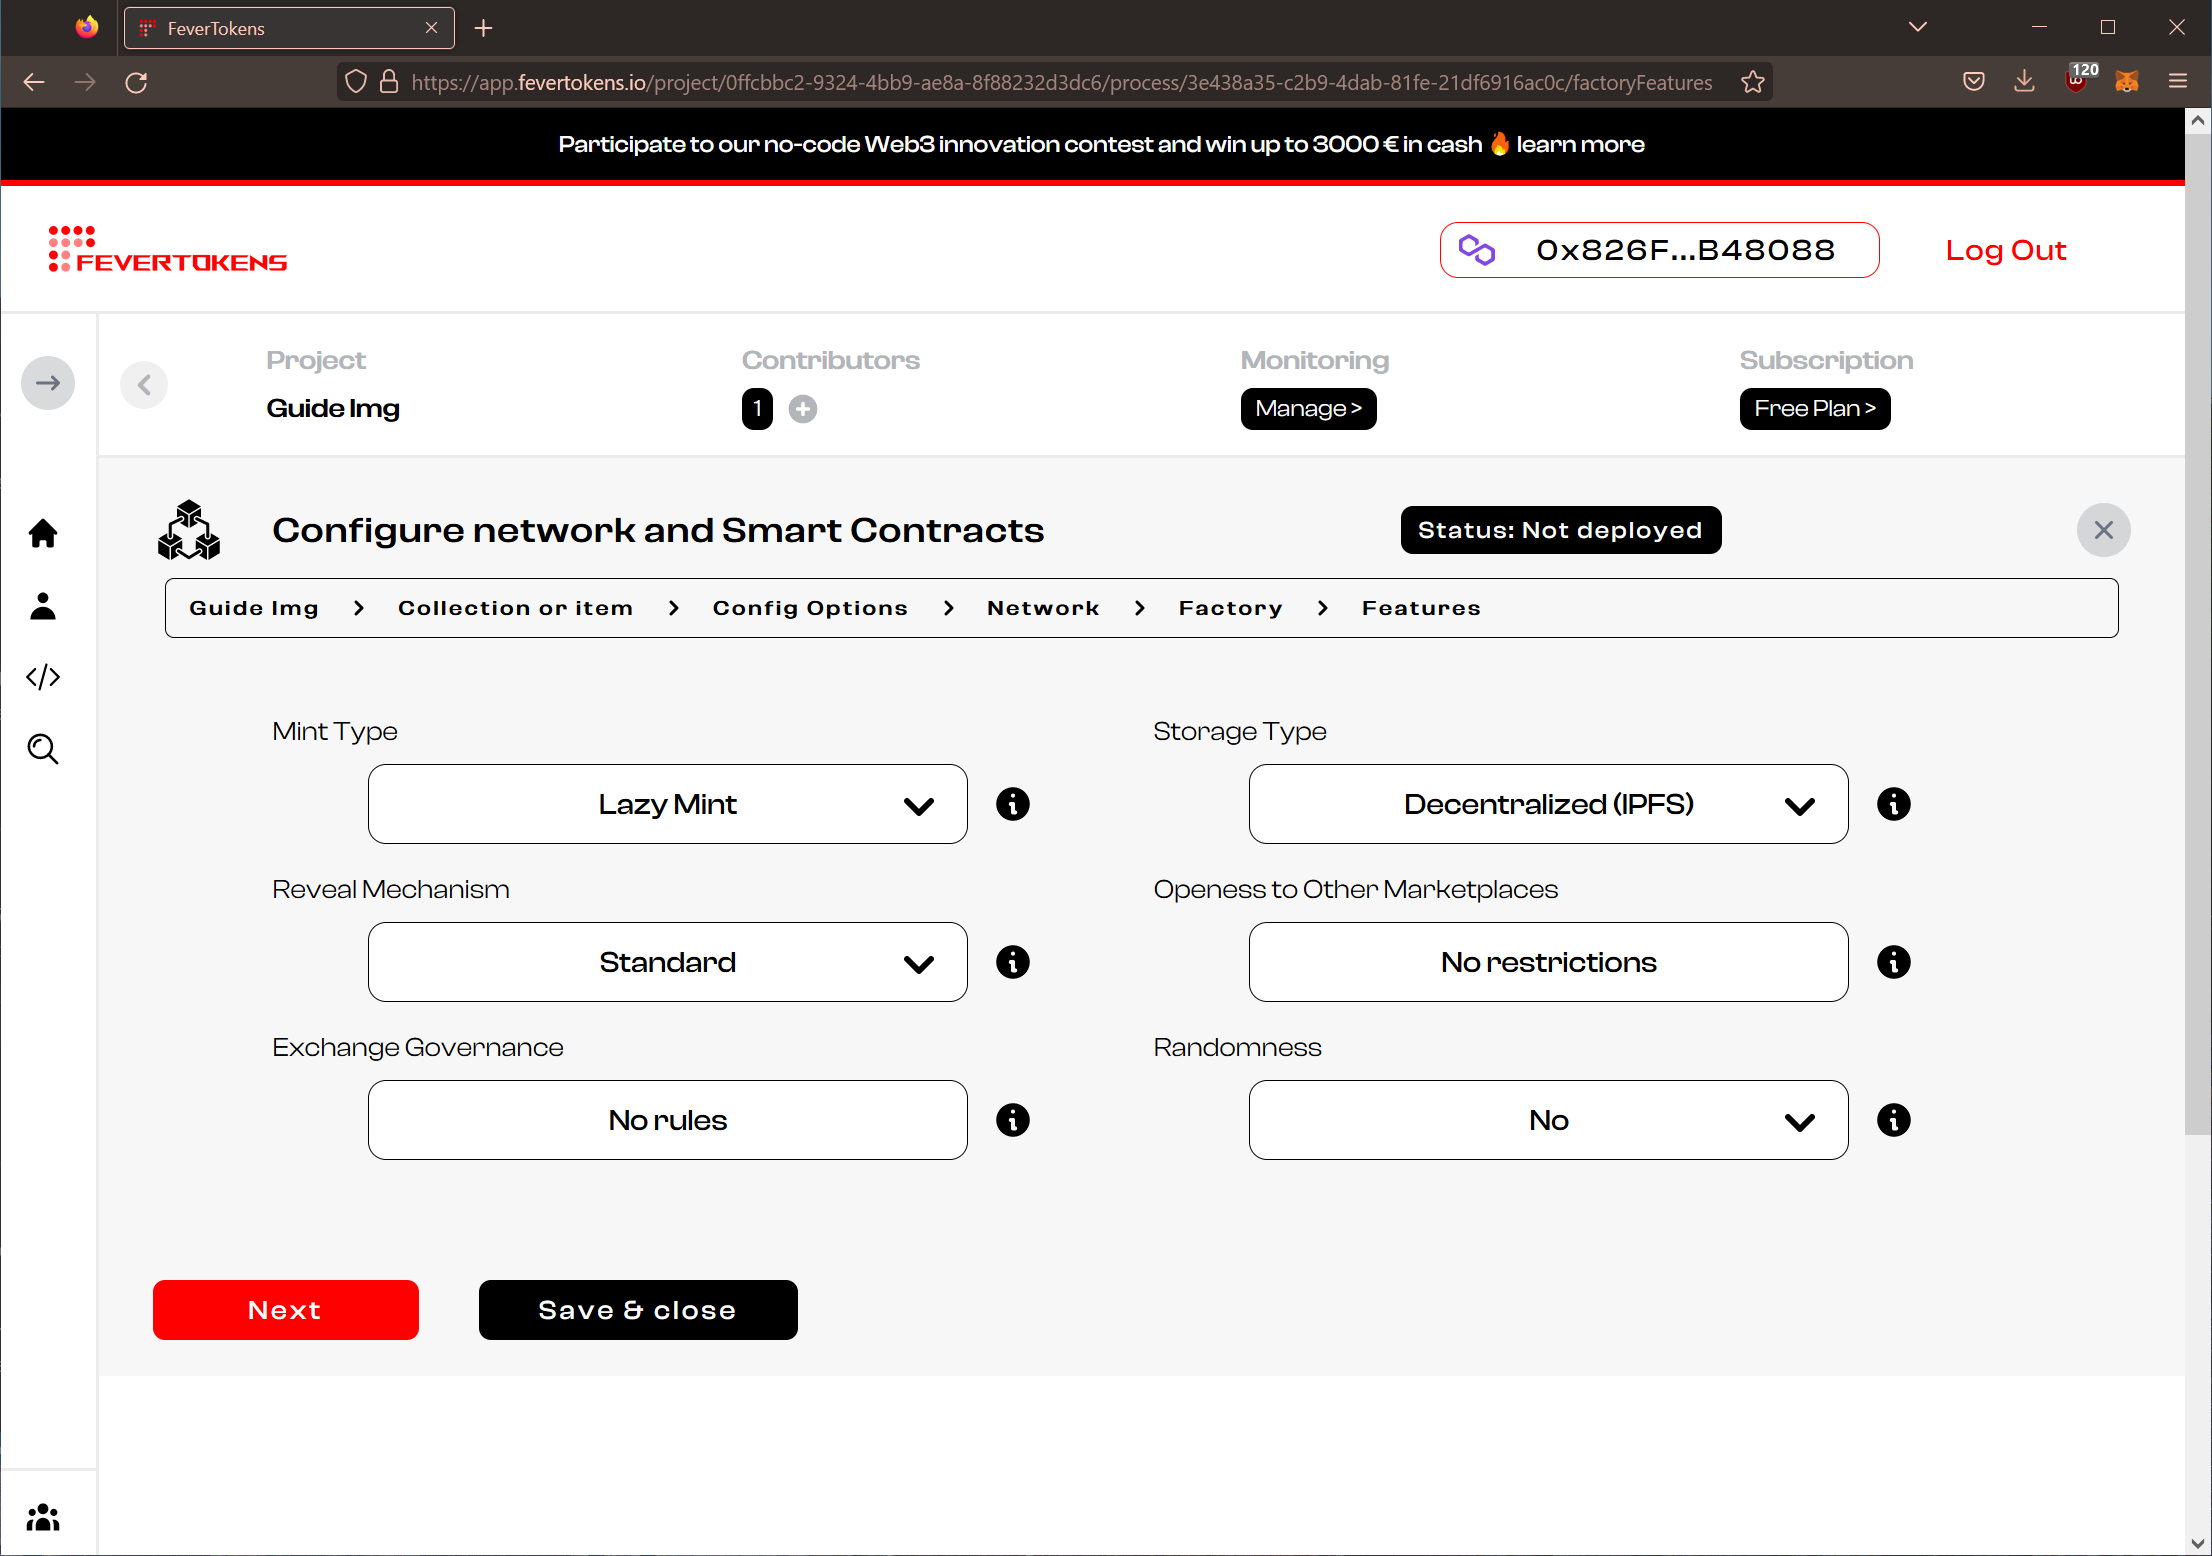
STEP 6. Configure the NFT features
At this step, you will be given a list of features that you can choose from.
- Mint Type: Choose Lazy Mint to have the NFT minted only upon sale. Choose Standard Mint to have the NFT minted at deployment.
- Storage Type: Choose Decentralized (IPFS) to use decentralized storage for the metadata and digital assets associated with the NFT. Choose Centralized (Cloud) to use cloud storage instead.
- Reveal Mechanism: Choose Standard to allow users access NFTs for sale immediately. Choose Delayed to make NFTs available for purchase in a delayed manner.
- Randomness: Choose Yes to enable random mint. This requires choosing the Delayed reveal mechanism.
When you are ready, click Next.
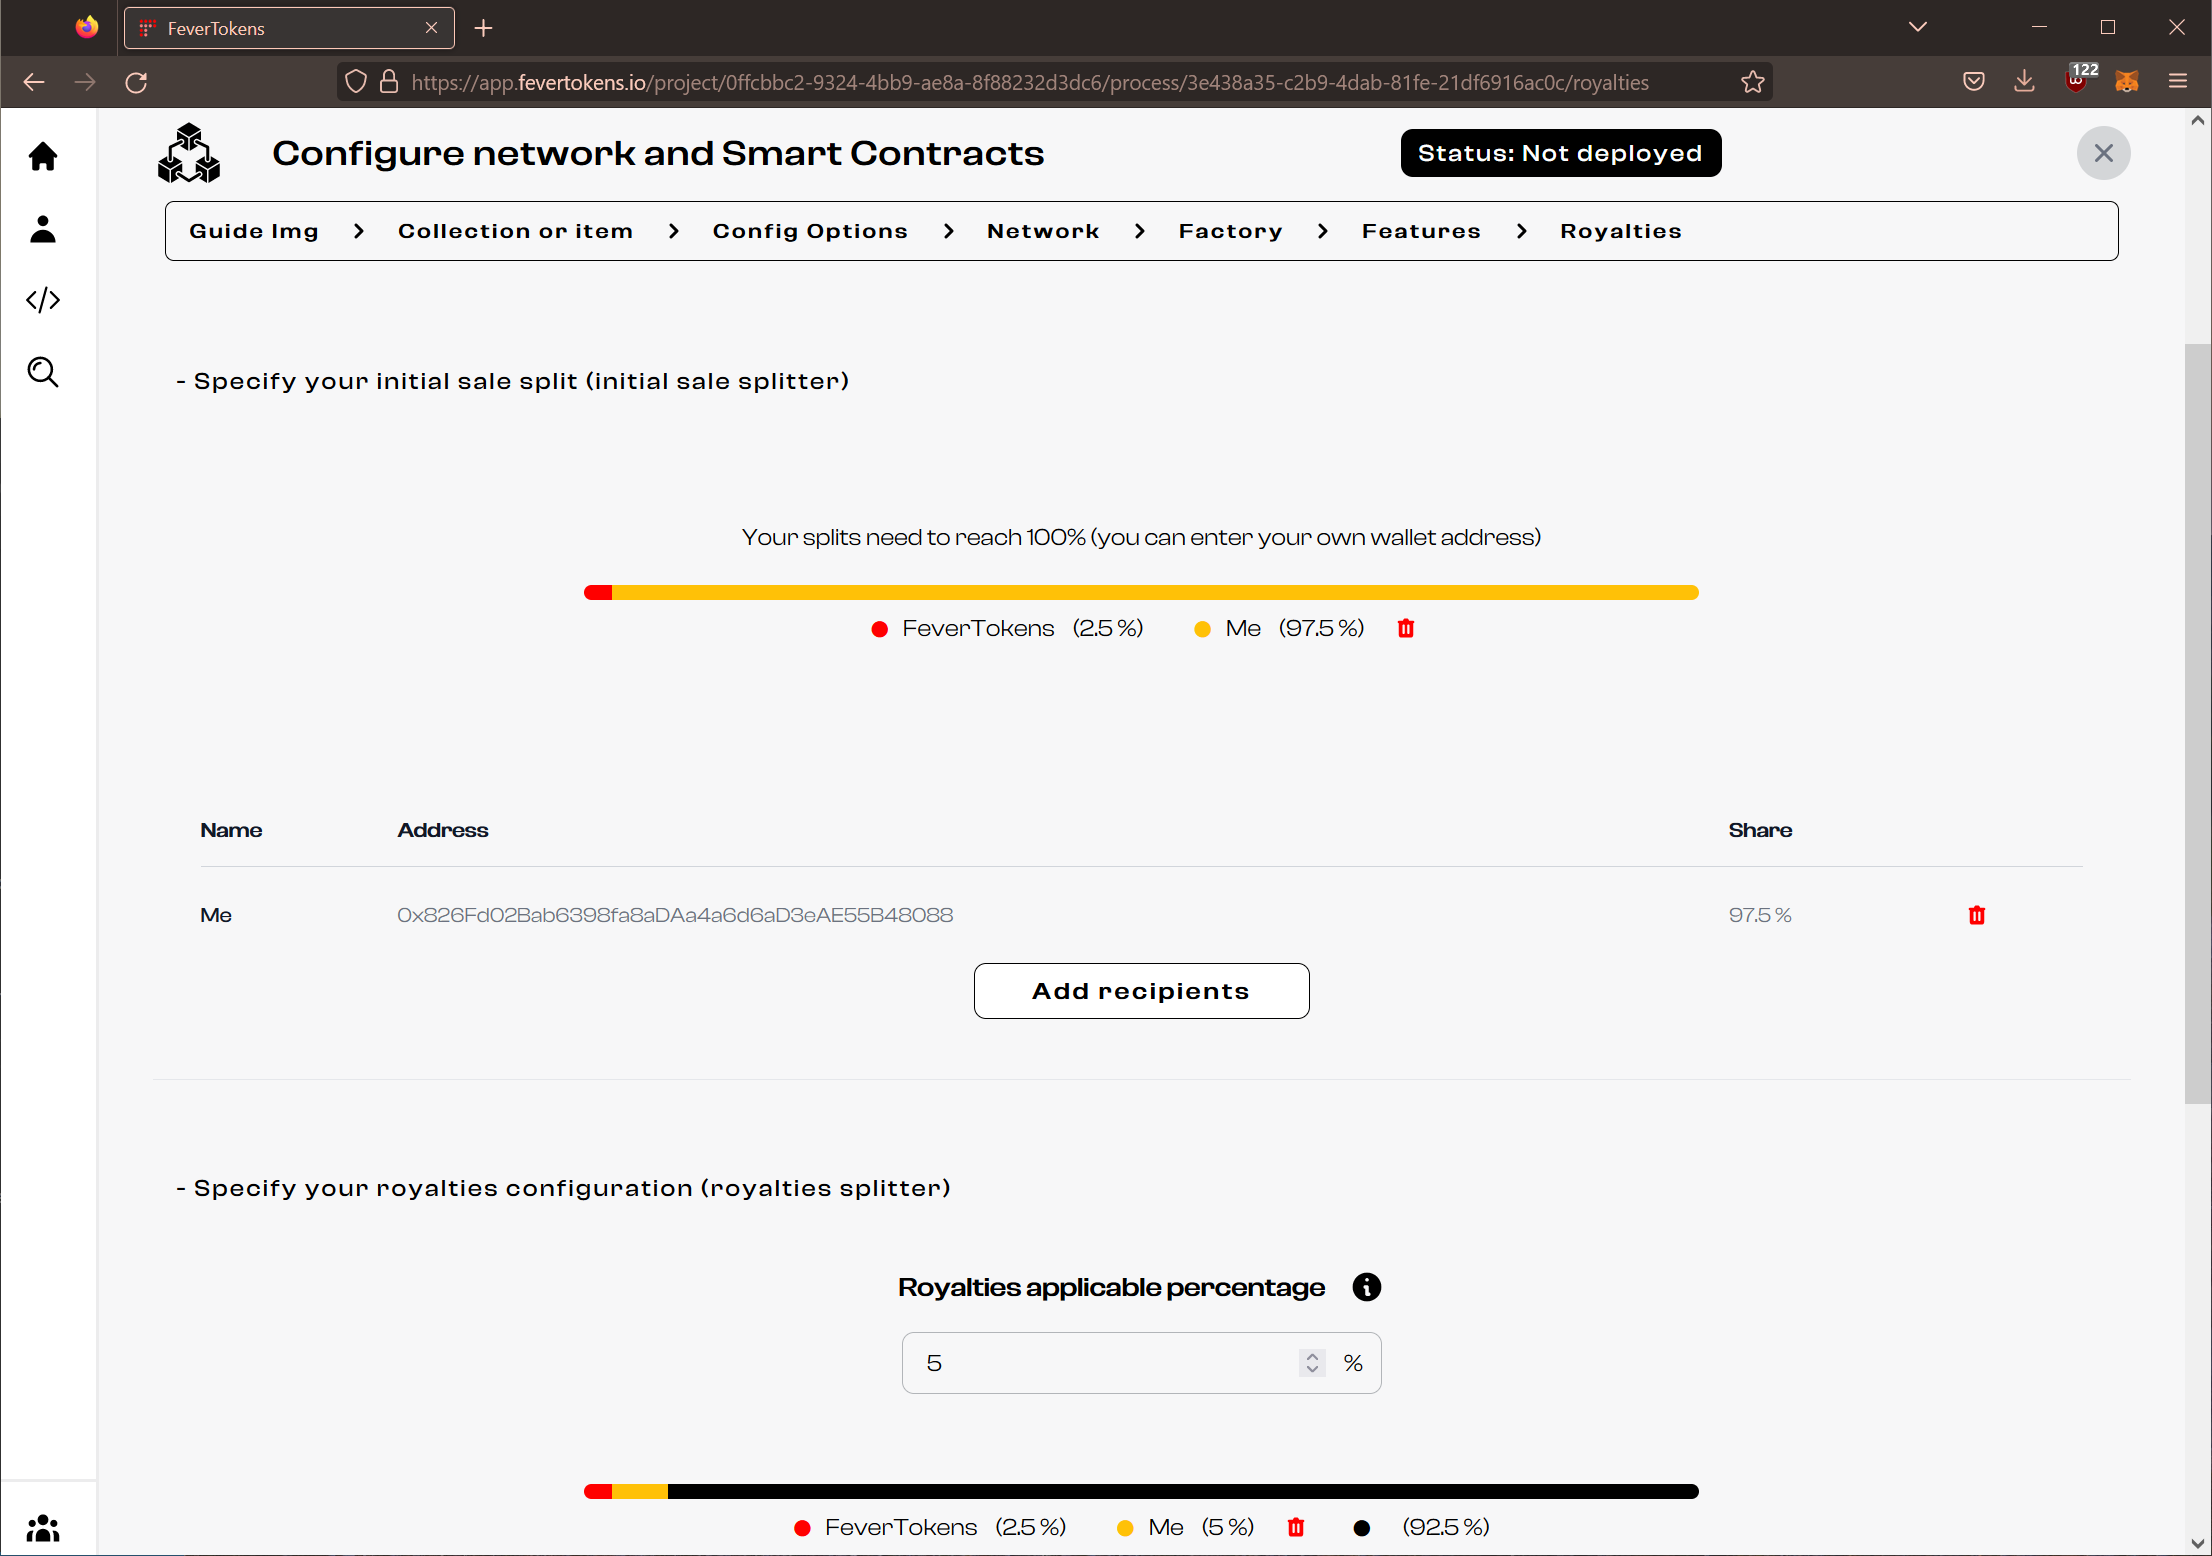
STEP 7. Configure the initial split and royalty structure
At this step, you can specify how the earnings as well as royalties for the item / items in the collection will be split.
- Click Add recipients to add wallets to which earnings / royalties for the item / items in the collection will be paid to automatically once the smart contract is deployed and transactions on the smart contract are executed.
- A royalty percentage should be set.
- FeverTokens reserves 2.5% of the initial sales and future royalties.
Note: Royalty differs from initial sale in that the creator can continue to receive a proportion of the transactions in the secondary market. Note: A royalty of 100% means that the person selling the NFT receives NOTHING! Note: Our optimized smart contracts ensure that the split will be in effect wherever the transactions take place: once published on the MainNet, the smart contract will execute the split automatically.
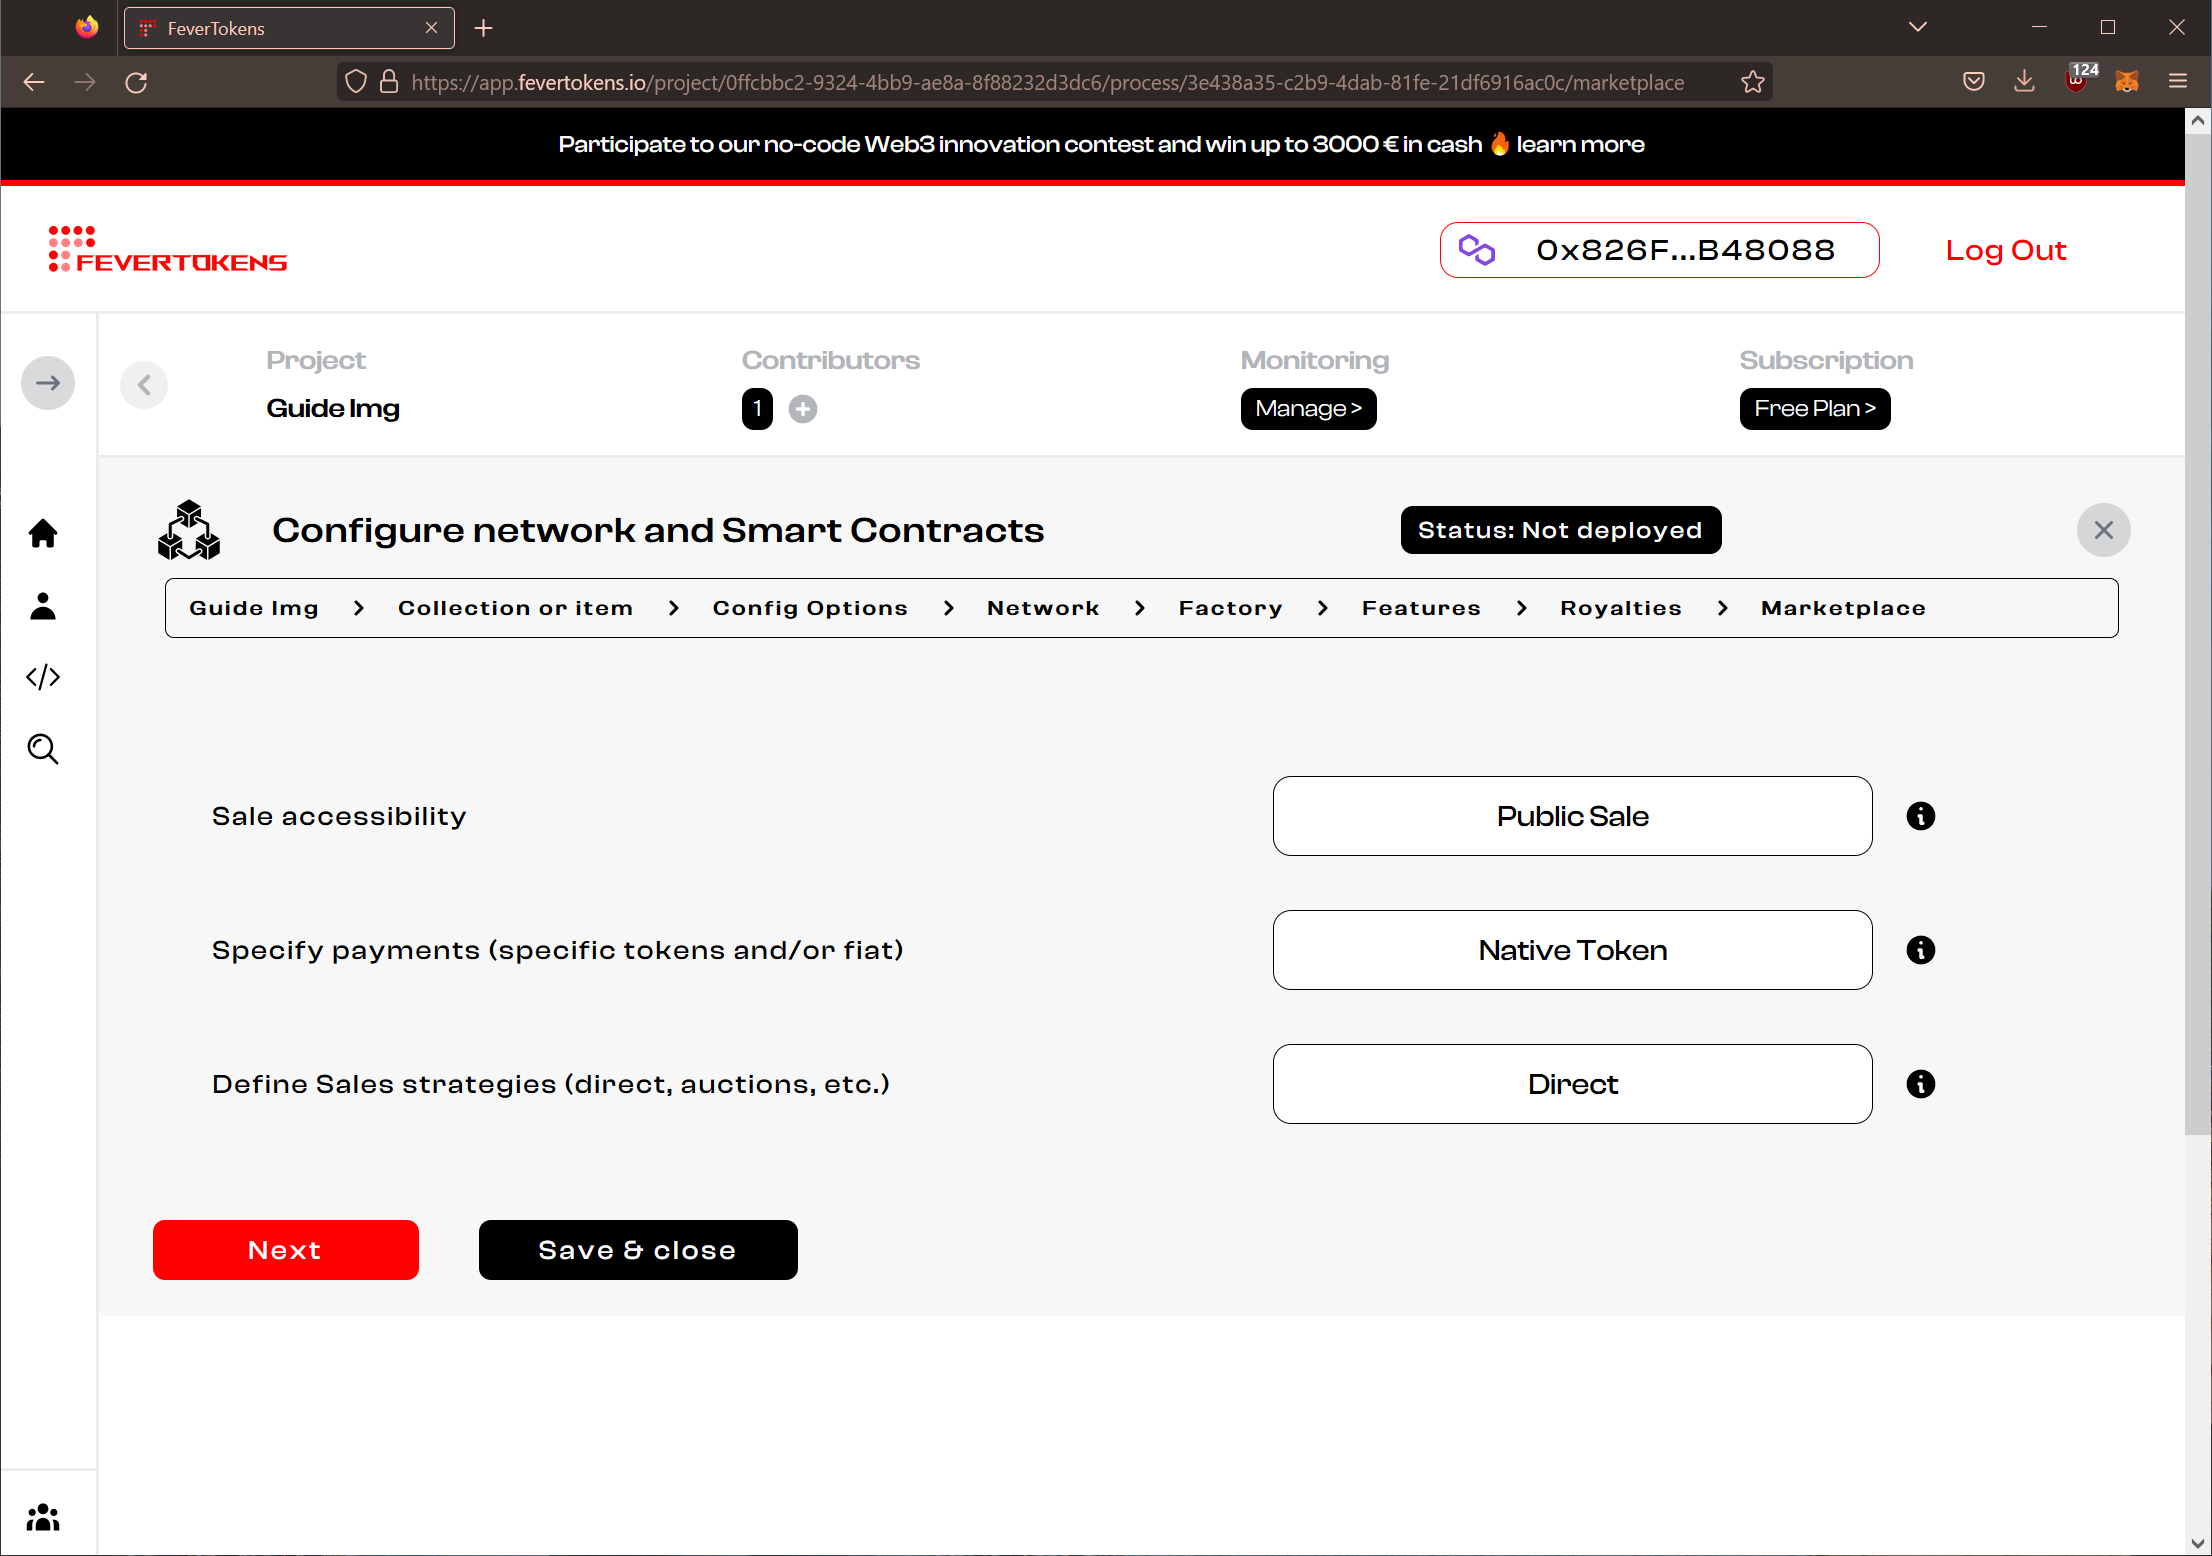
STEP 8. Configure the marketplace
At this step, you can specify how you want the item / items in the collection to be sold on the marketplace.
- You can choose to whitelist certain wallets and exclude others from buying.
- You can choose how you would like to be paid. Currently, only payments in Native tokens are supported.
- When you are ready, click Next to continue.
STEP 9a. Change network to Testnet
If applicable, click the button to switch to the Testnet of your chosen network.
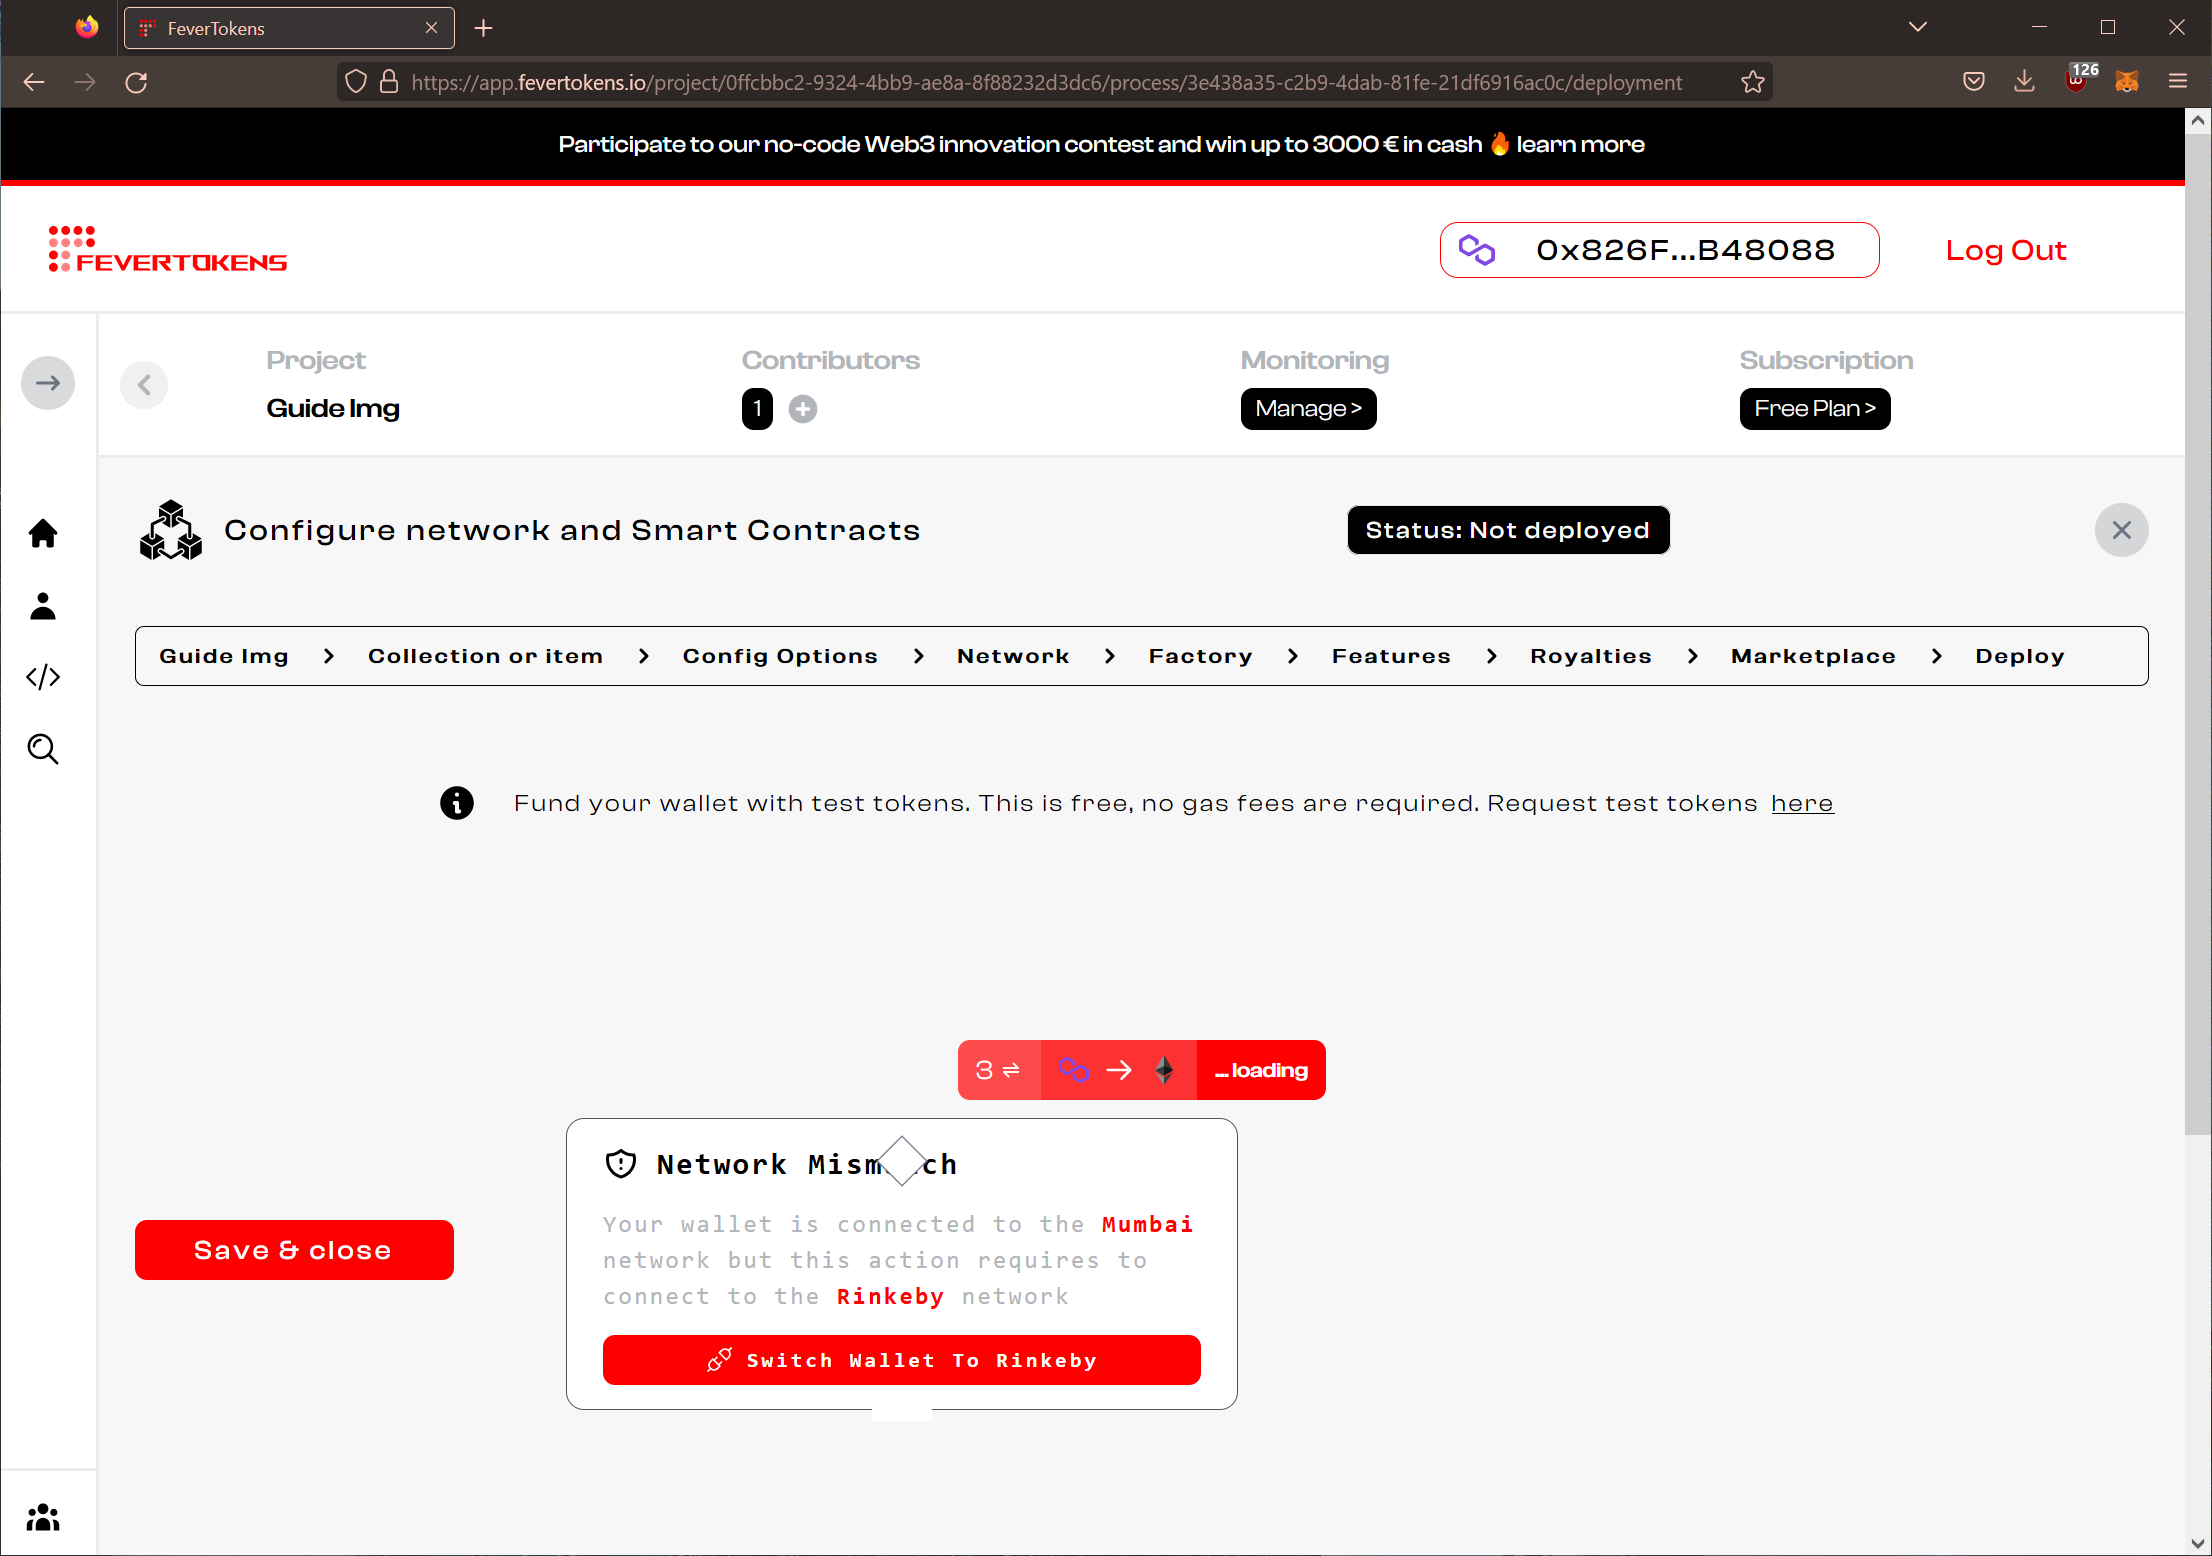
STEP 9. Deploy to Testnet
While optional, we encourage you to test your configuration with Testnet first, at least the first time that you use FeverTokens.
- Deploy the initial sales splitter. When asked, confirm the transaction from your wallet.
- Deploy the royalty splitter. When asked, confirm the transaction from your wallet.
- Deploy the NFT factory. When asked, confirm the transaction from your wallet.
- When you have finished, click Save & close to go back to the project dashboard.
Note: Before the contract is deployed to the MainNet, it remains possible to change the network as shown in STEP 8 above. Once deployed, you can only duplicate the collection and redeploy to another blockchain network.

In the next guide, we walk you through how you can deploy your NFT marketplace on the mainnet using FeverTokens console.